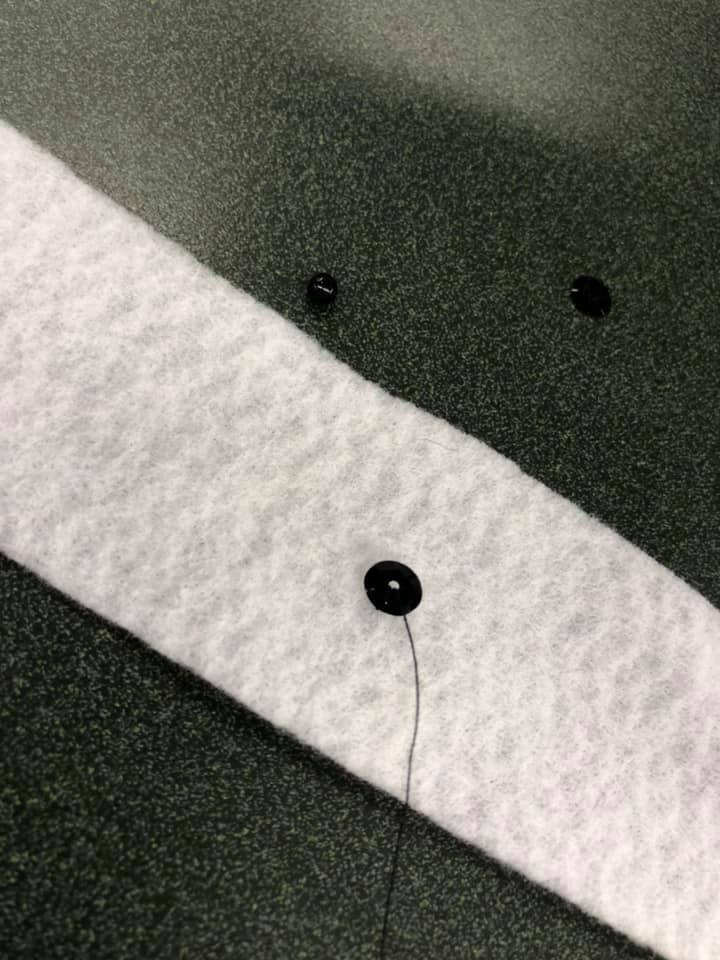
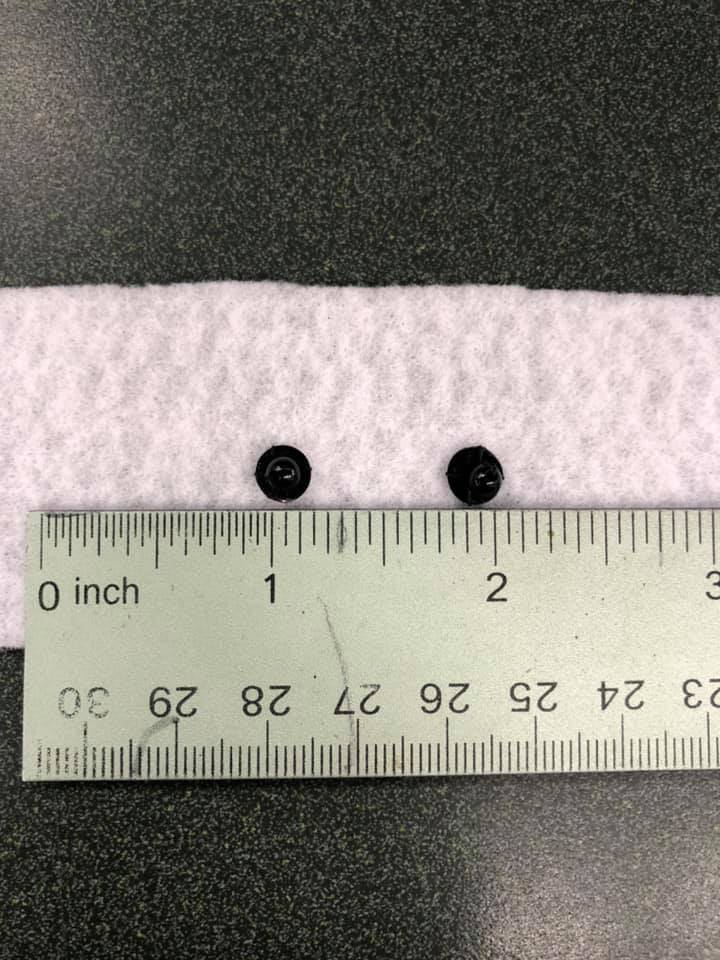
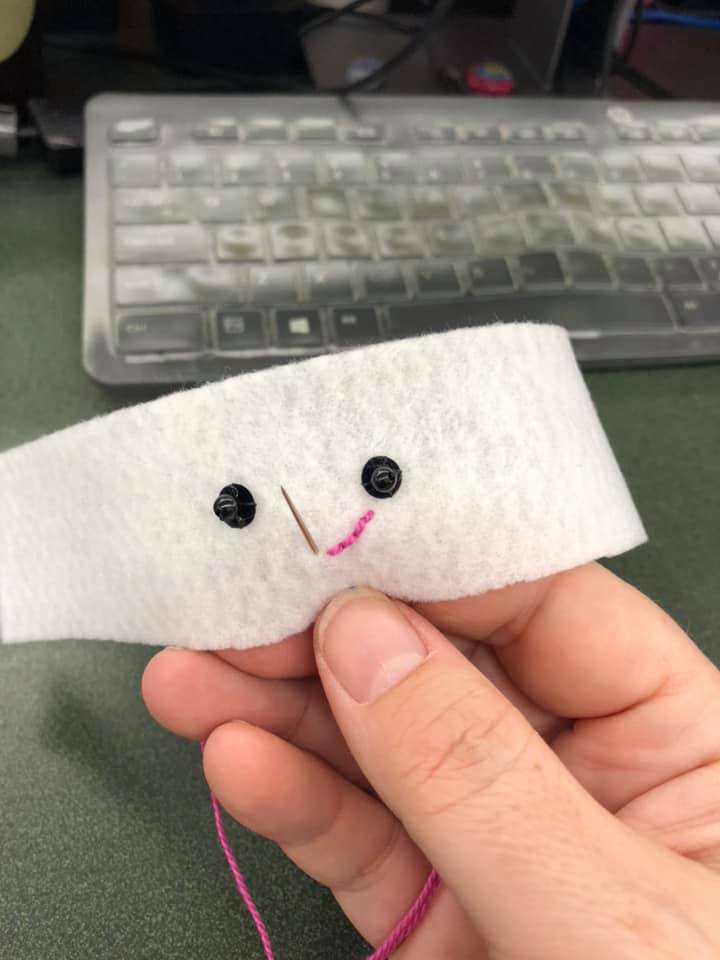
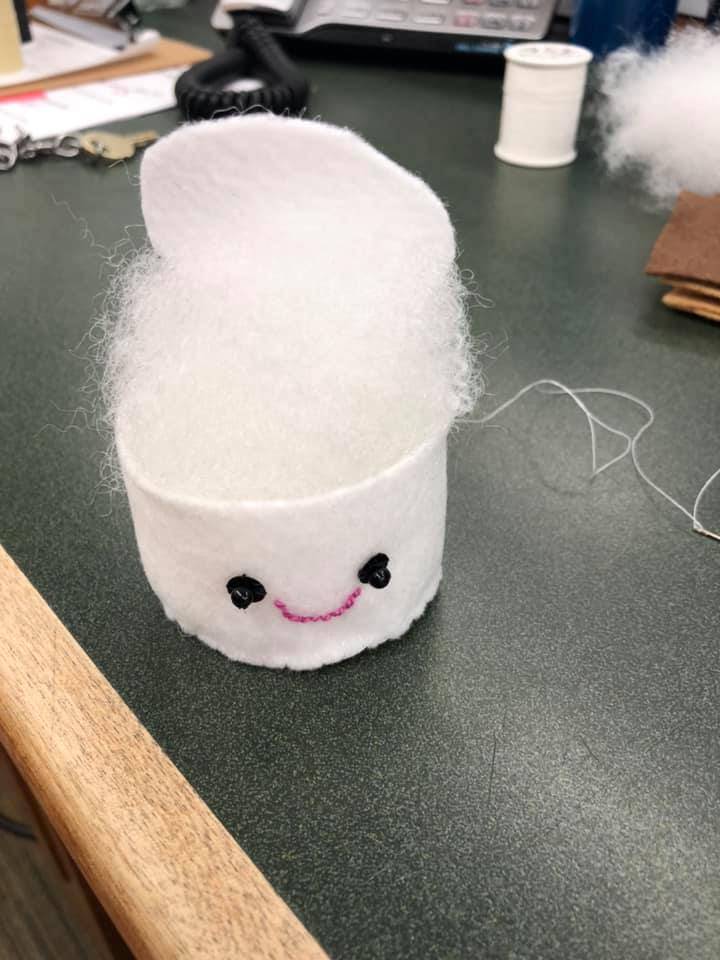
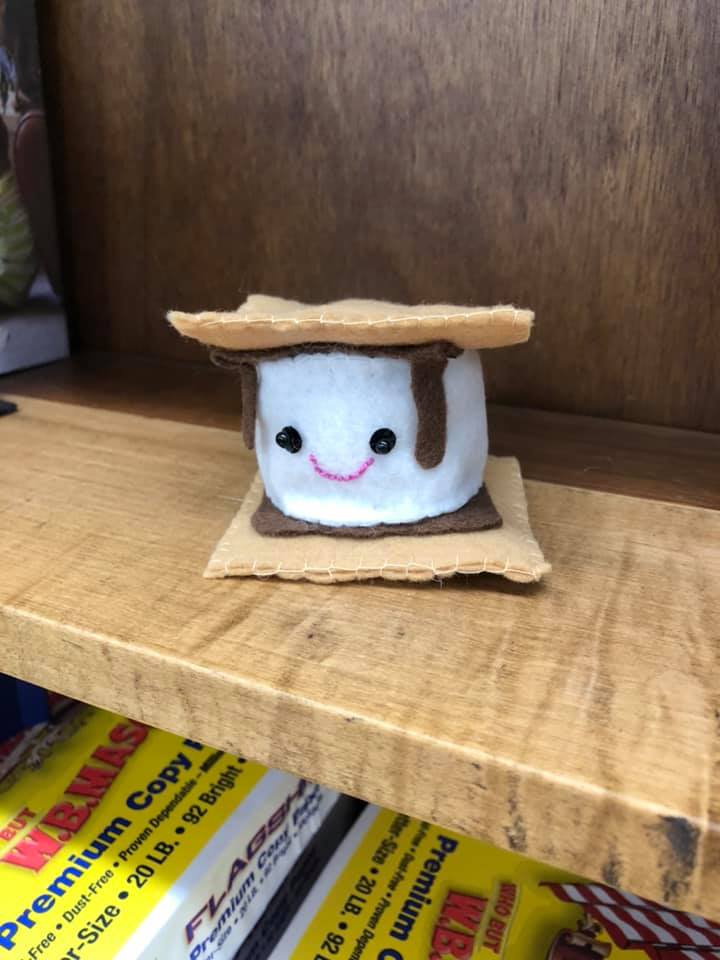
Embroider the face onto the center of the white rectangle. I used the black sequin as the base and stacked a black bead on top to make a 3 dimensional eye.
Make the eyes approximately 1 inch apart
Use embroidery floss to stitch a smile
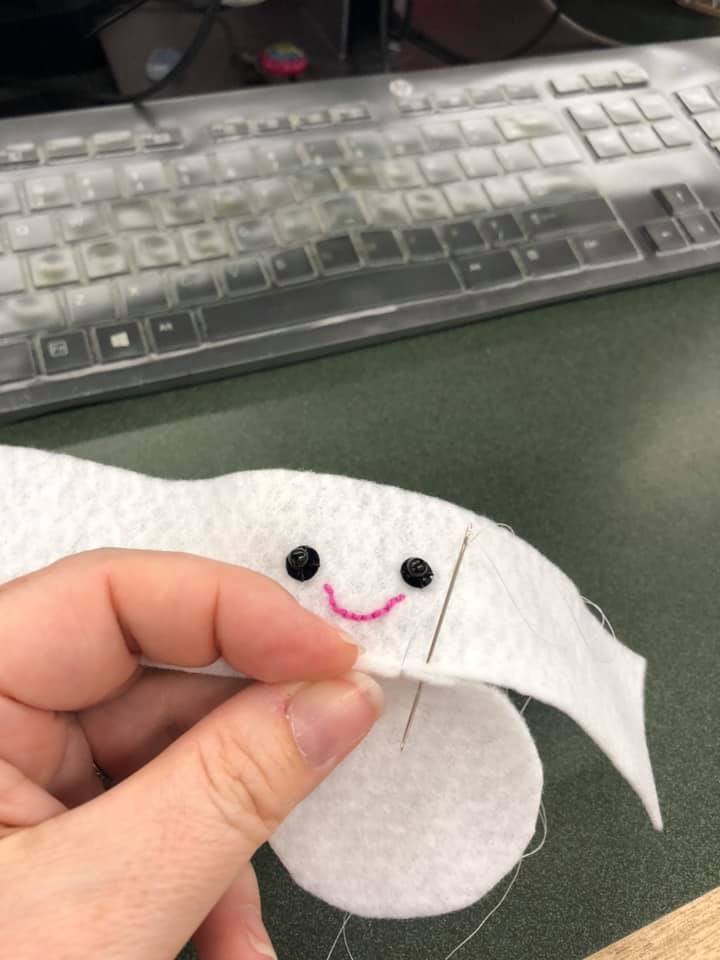
Stitch the bottom circle to the rectangle
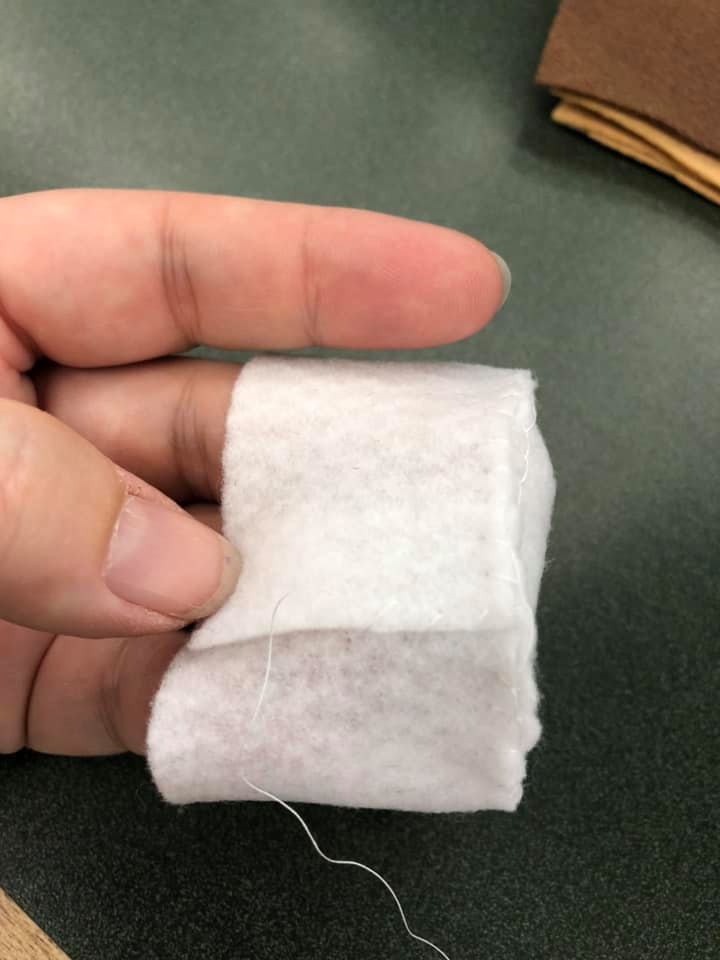
When you finish the bottom circle, then close the flap on the rectangle
Stitch the top circle, adding fiberfill before closing up
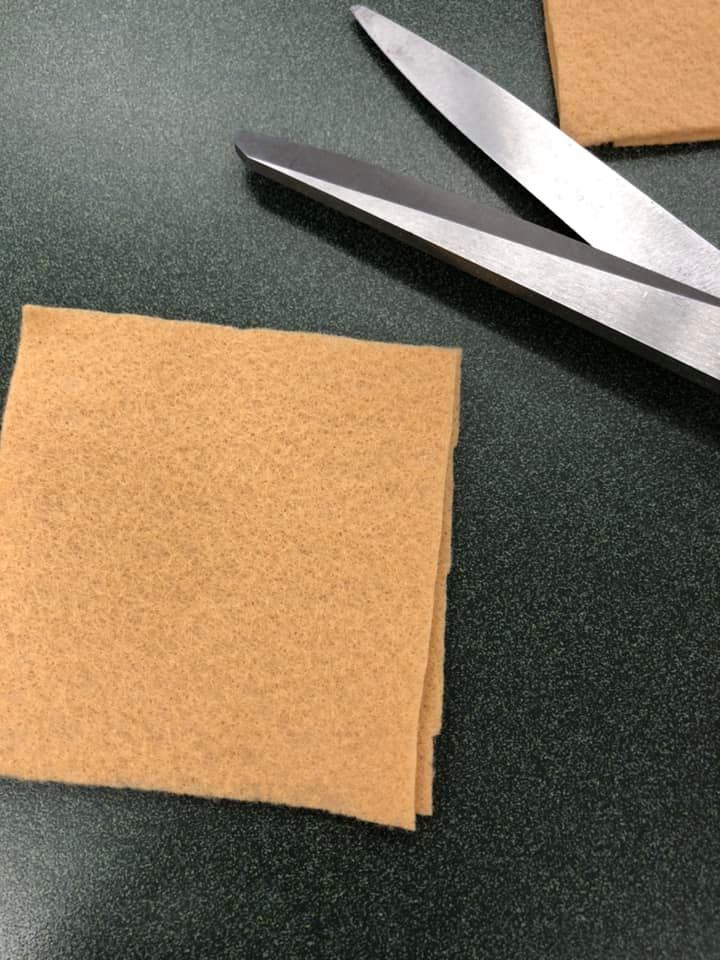
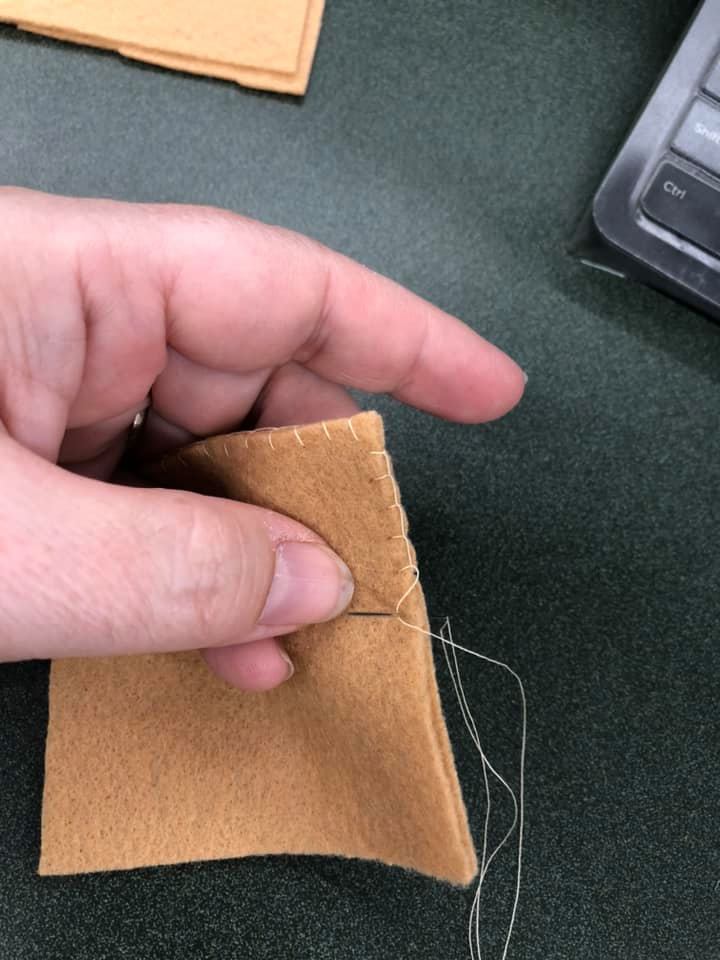
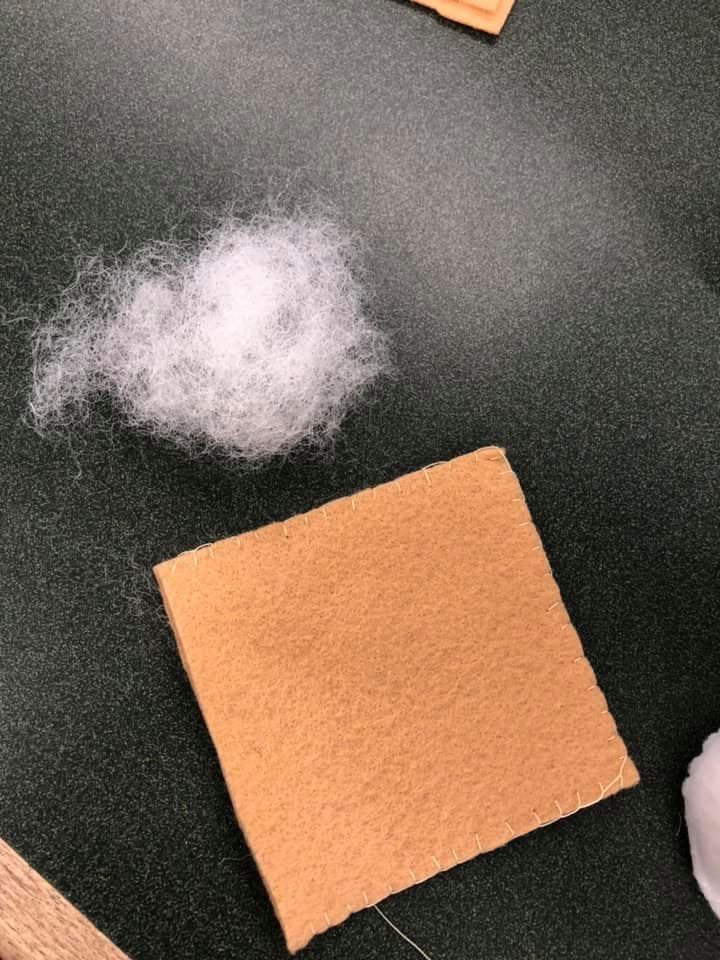
Square up the tan felt if necessary for making the top and bottom cracker. Each cracker piece will be doubled up with just a pinch of fiberfill to go inside. Stitch both crackers.
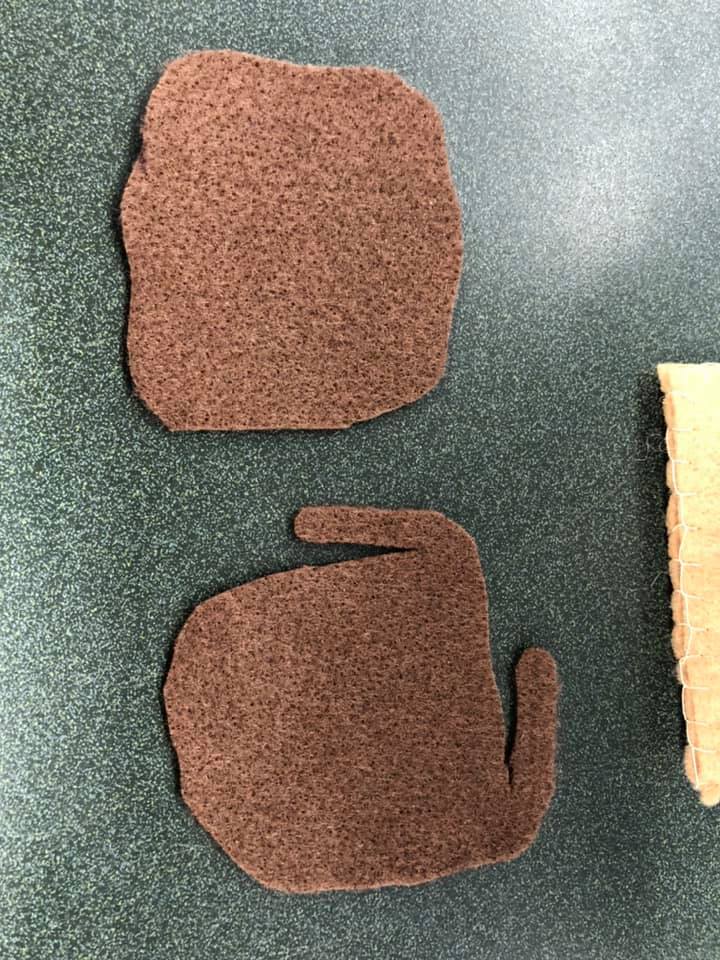
Make a wavy cut for the bottom piece of brown chocolate. Also freehand cut a drip or two for the top piece of brown chocolate
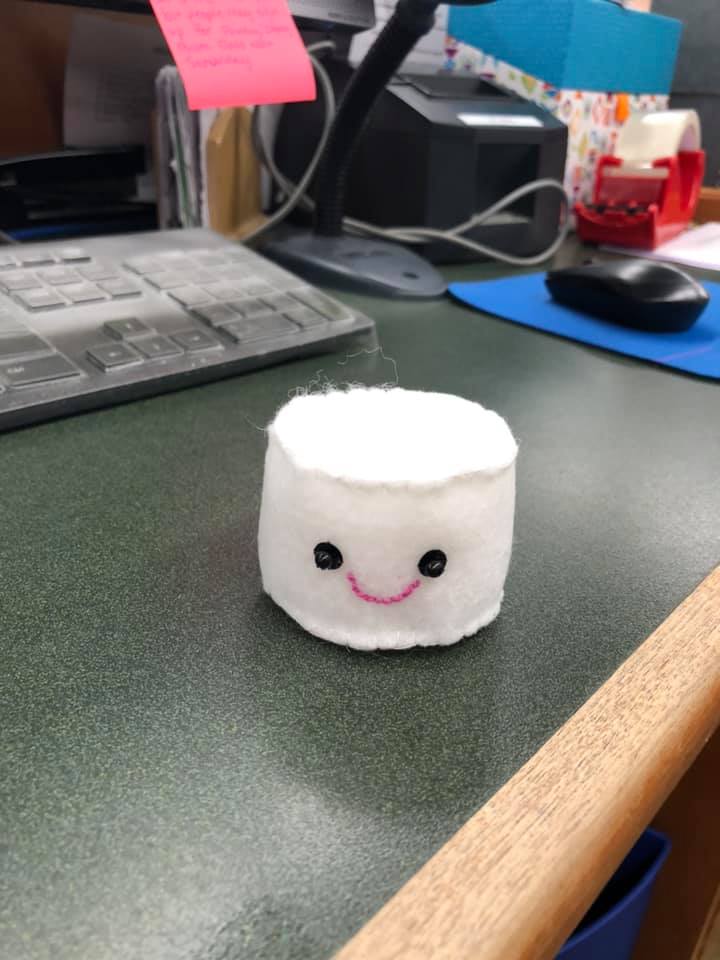
Assemble your smores and use long piece of thread to sew it top to bottom, securing all 5 layers
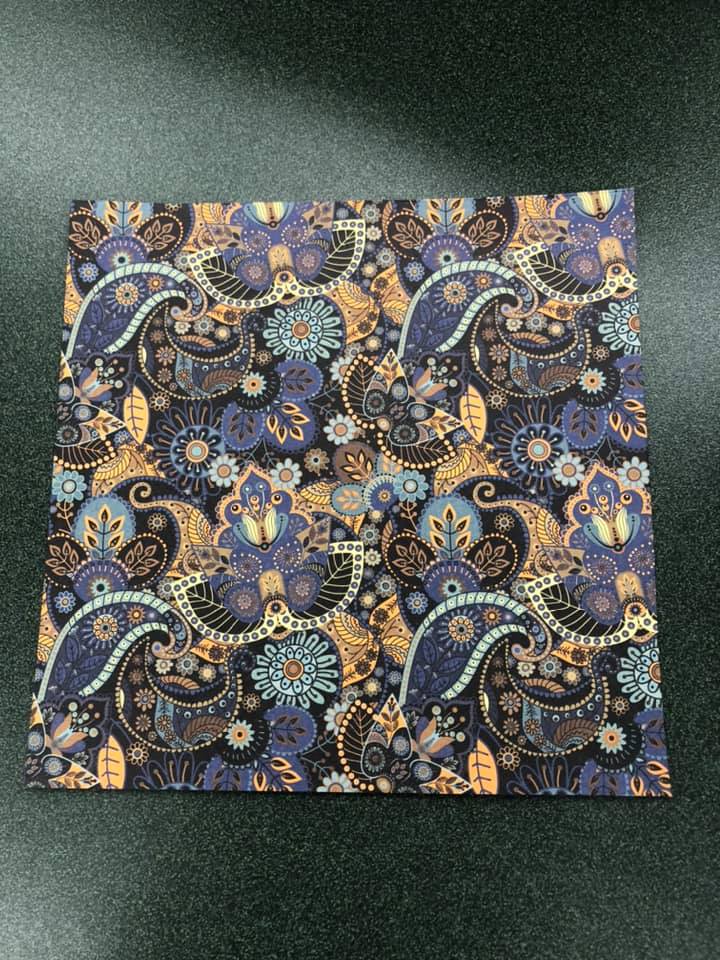
Select a piece of 6” X 6” cardstock or scrapbook paper
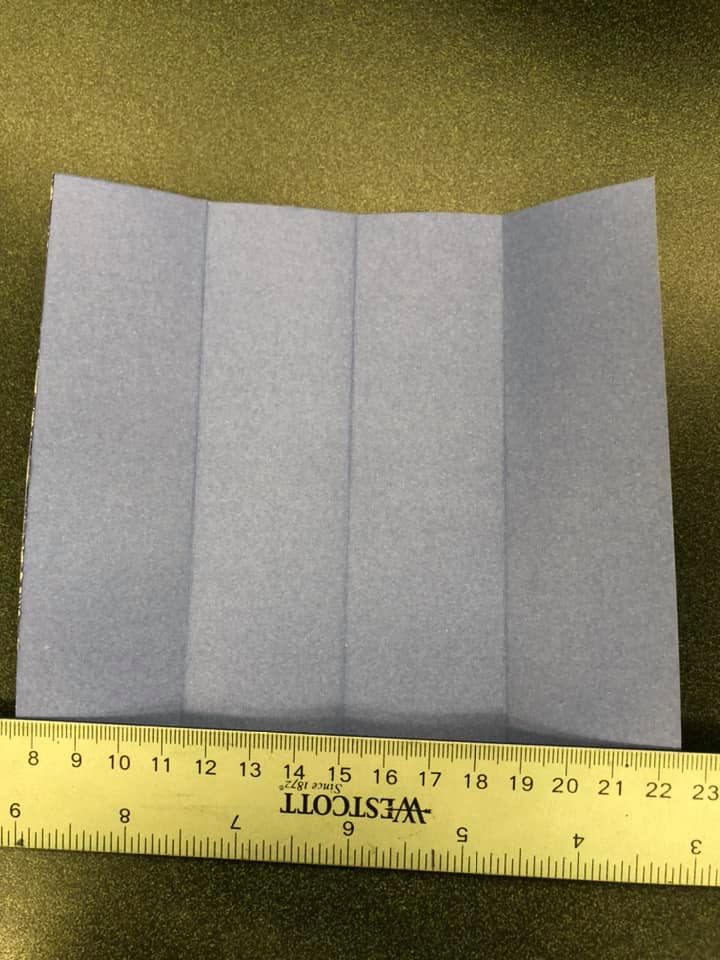
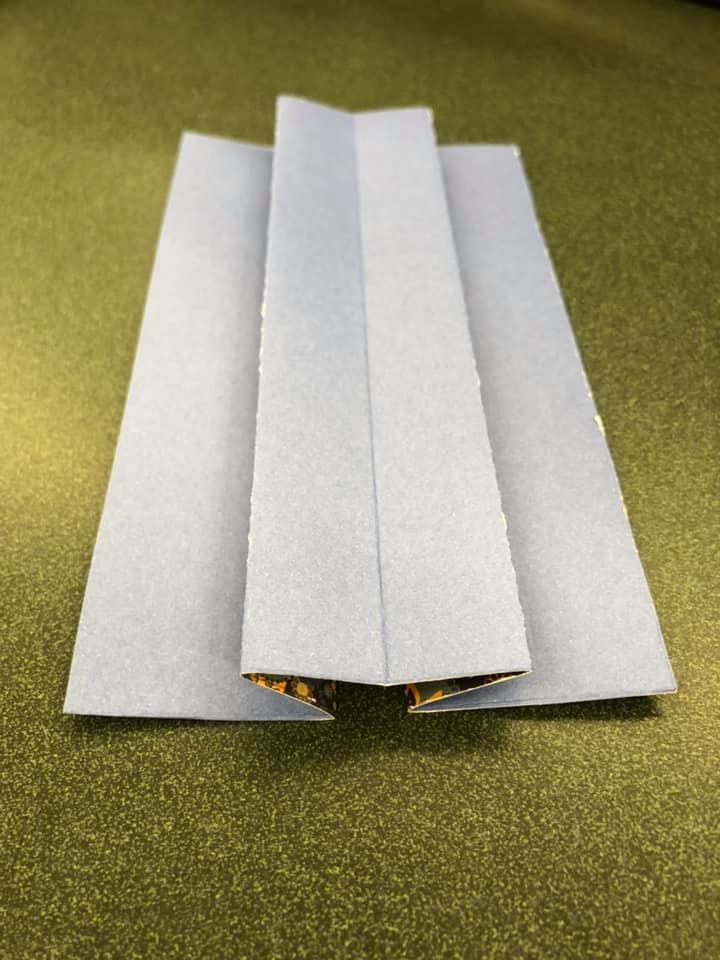
Fold in half and crease, then fold those halves again and crease like the image below (This is the backside or “ugly side” of my work where it’s easier to see the folds, ignore the ruler)
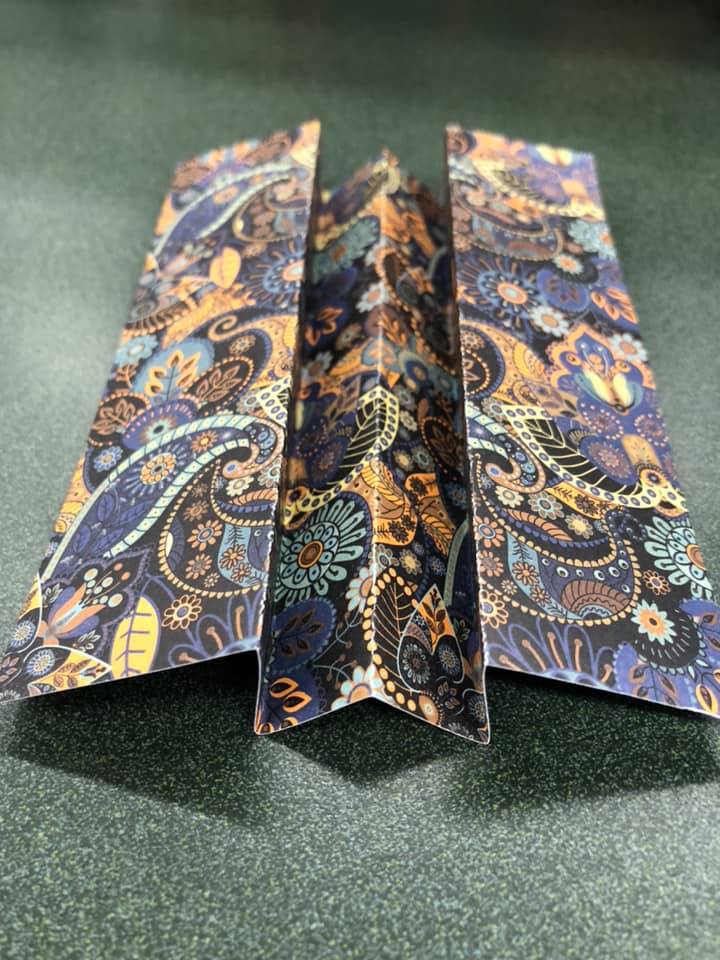
There are now 3 creases to your work. If we number them left to right as “1/2/3”, our next step is to turn work to the front “pretty side” and fold creases 1 and 3 in the direction of crease 2. The image below will show you both pretty side and ugle side.
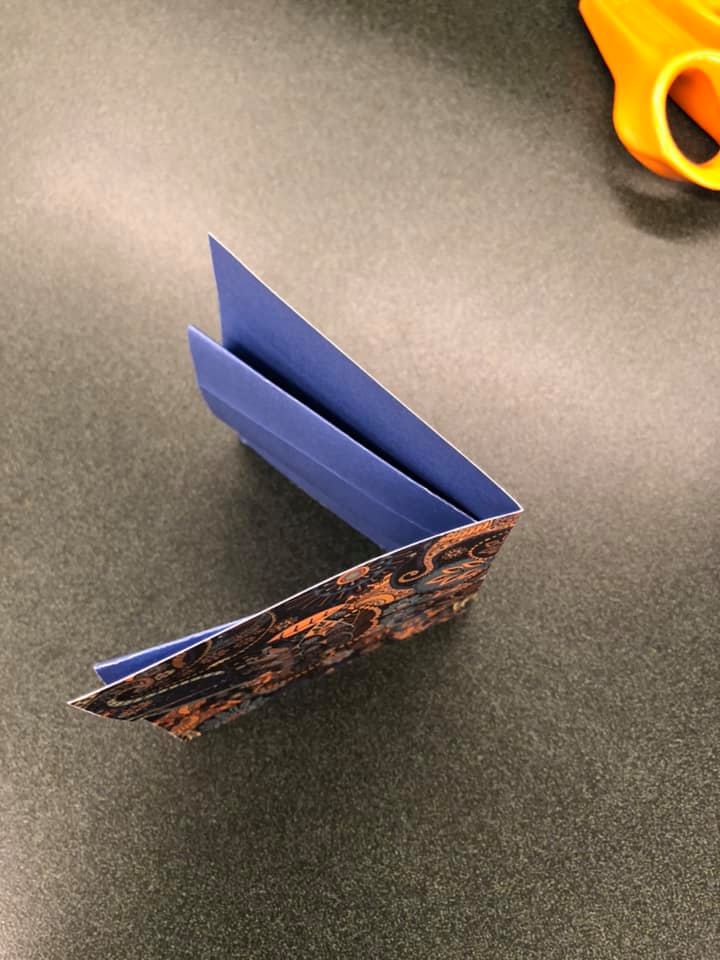
Now fold your piece in half top down, with pretty side on the outside, like the image below. It should look a little bit like a wallet.
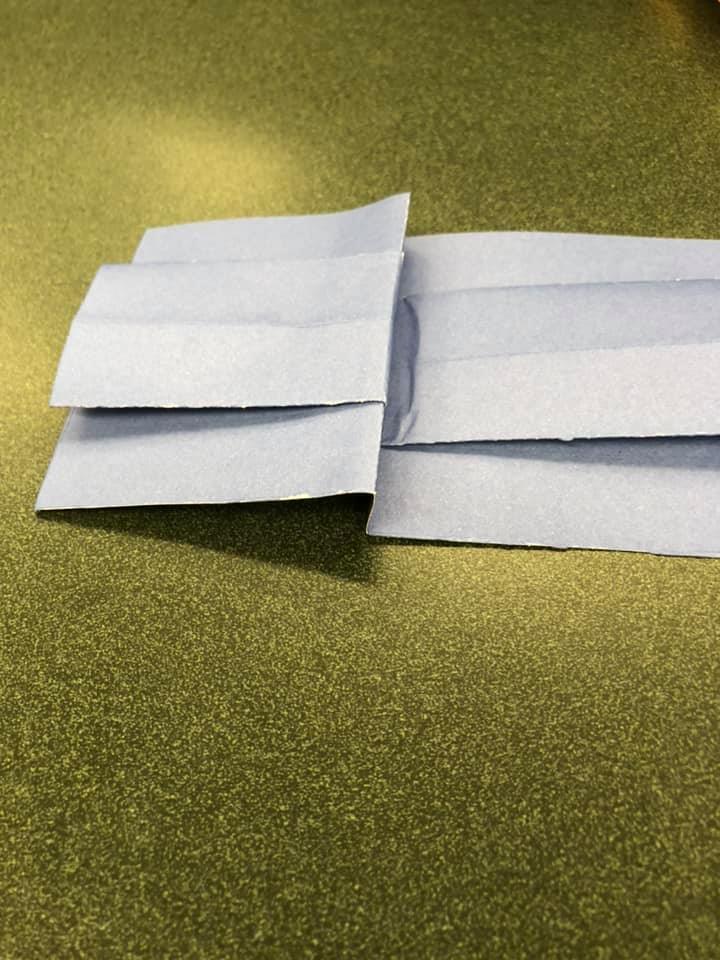
Next make a short crease (I did not measure but ended up with about a half inch) above the center fold. Your work should now look like a letter Z.
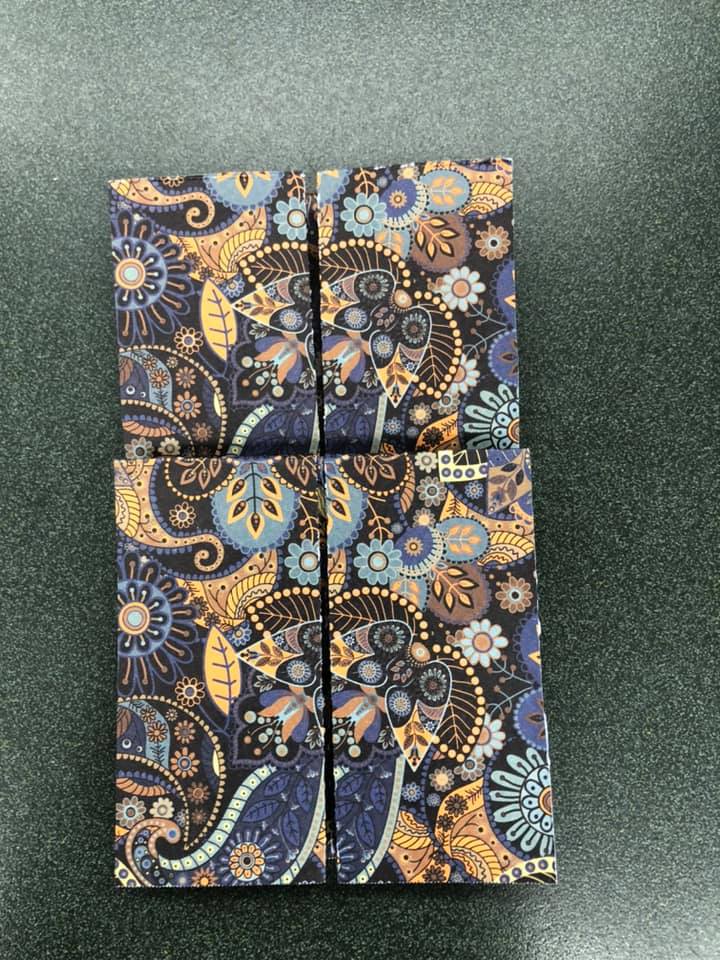
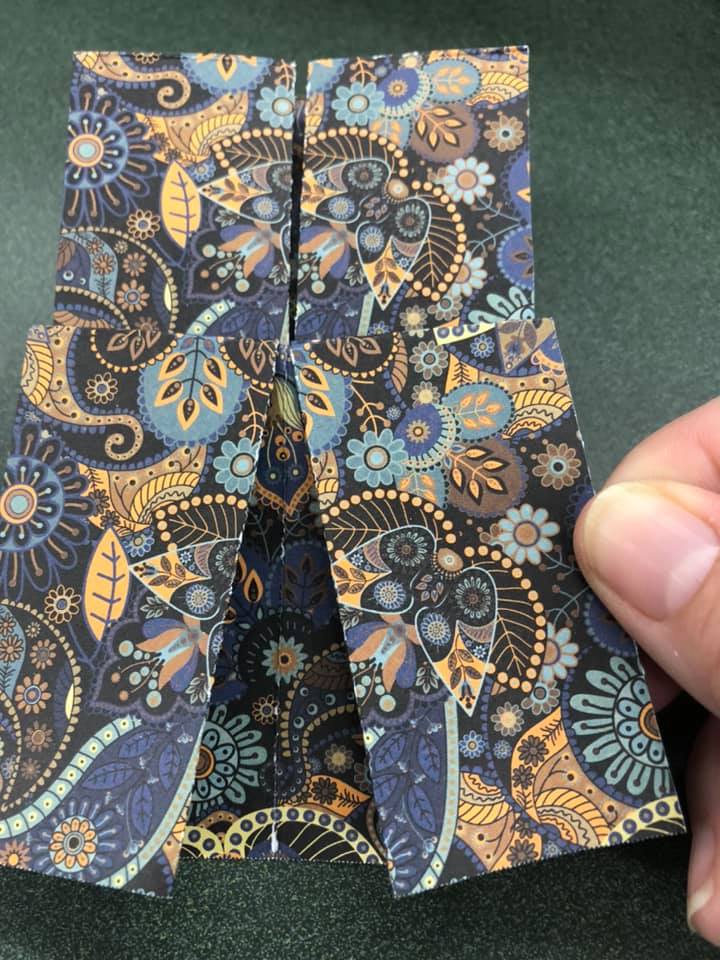
Turn work to the pretty side and align top down. It should look like the image below. You should notice that there are 4 parts: 2 shorter above and 2 longer below. Otherwise, it should be a rather neat rectangle.
The 2 lower parts will make the skirt of the dress. You will pull the bottom right corner to the right and press it with your fingers. Afterwards, pull the bottom left corner to the left and press it with your fingers. This will create an A-line to the skirt.
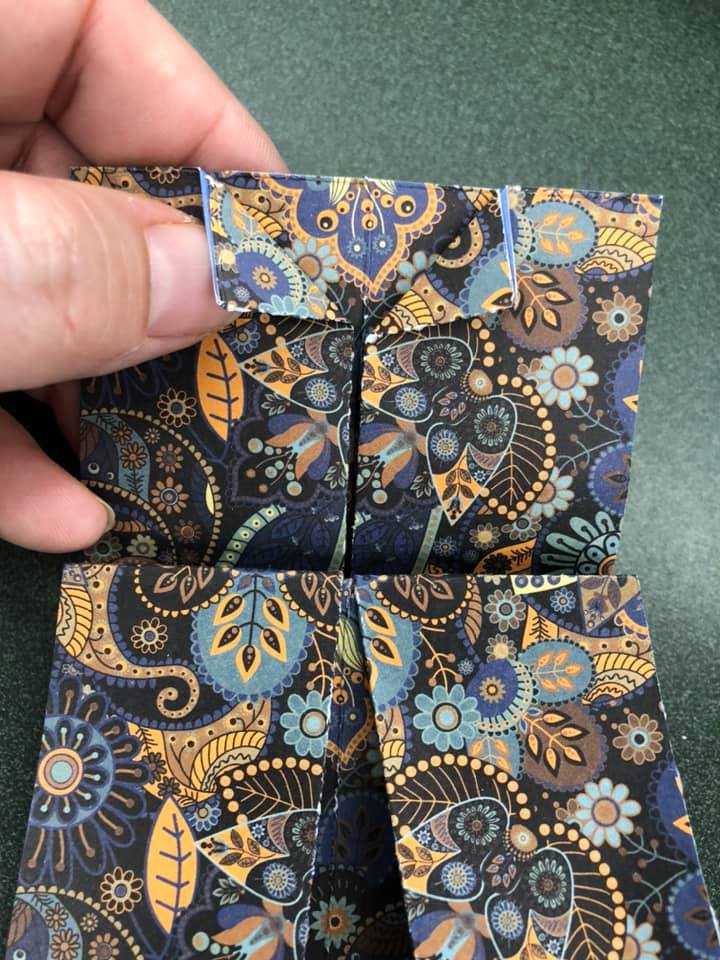
The 2 upper parts will make the dress bodice. Begin by making a neckline. Fold and crease the centers top-down like the image below.This should look like lapels.
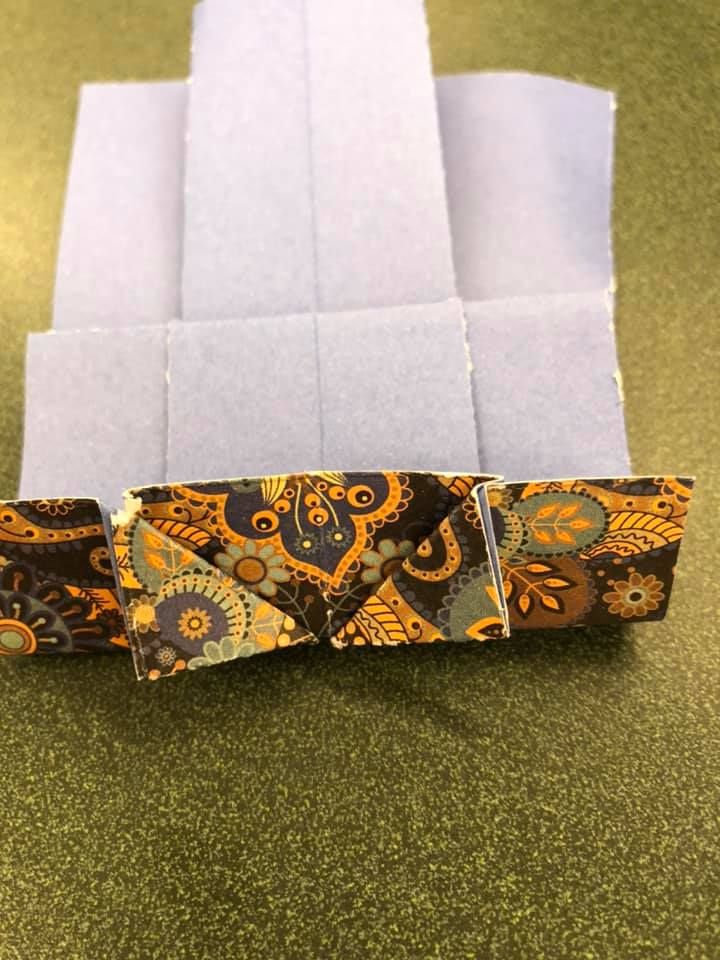
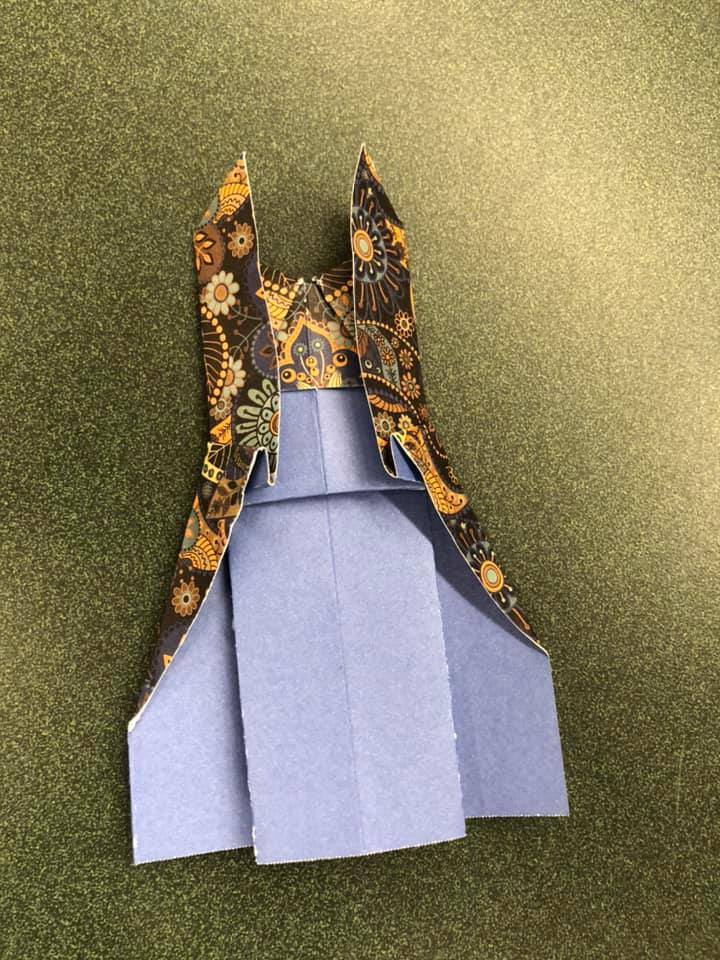
Keeping lapels pressed open, fold entire bodice in half, top down, following the lapel line. Below is a view from the ugly side of this step. I’ve even ripped the corner of my lapel a little bit but you’ll never see it in the end.
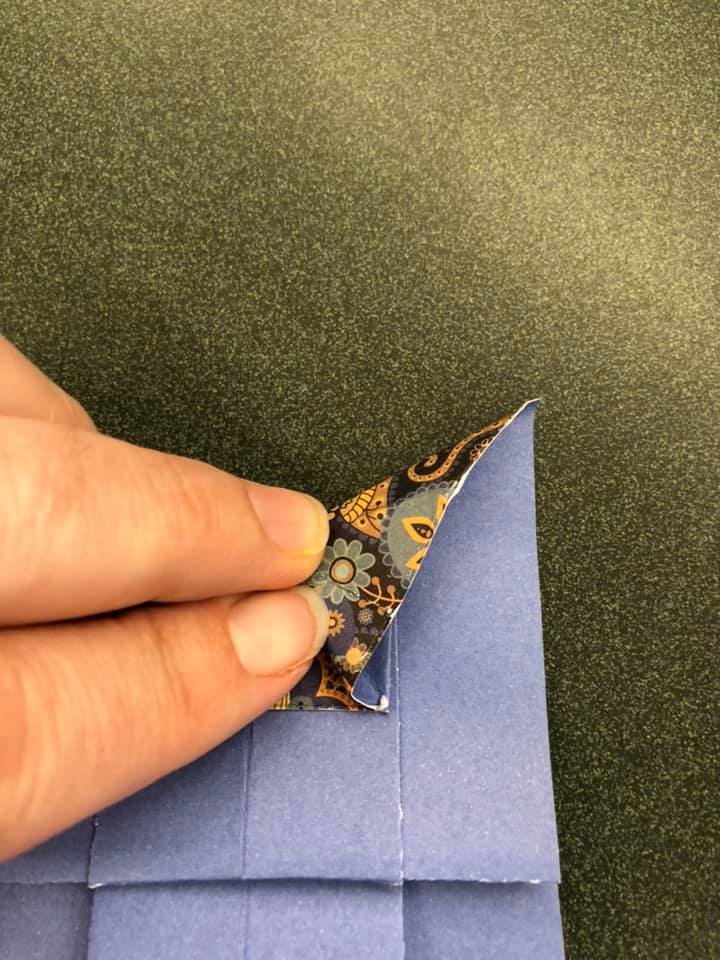
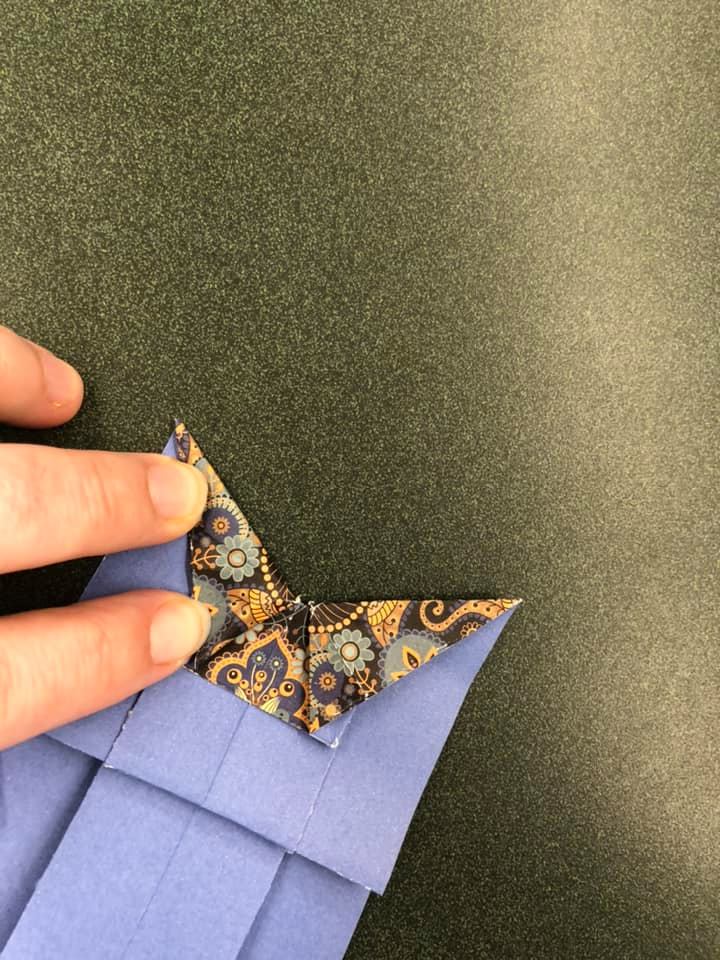
The next step was the most difficult for me. I hope I can break it down for you! I had to unfold the right lapel and re-crease it, making a triangle piece that came to a clean point on the right side. I repeated the same on the left lapel.
The image below is both lapels turned in a boat neck neckline.
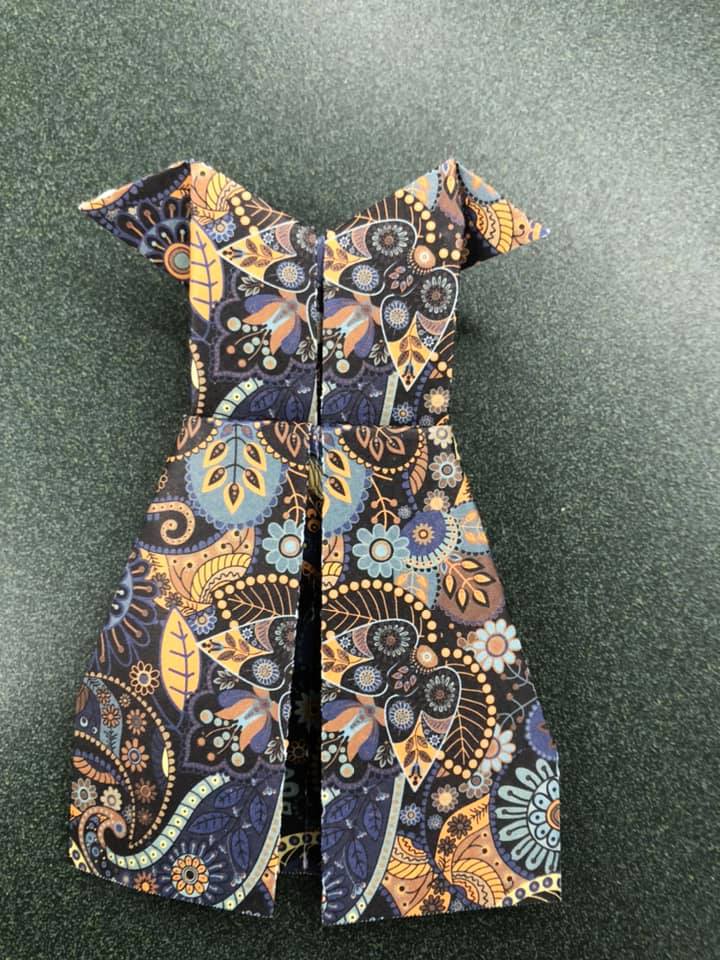
Congratulations! It’s all much easier from here to the end. You got this! Fold both bodice sides towards the back, making a narrow waistline. You will also fold a portion of the skirt to the back, completing the A-line of the skirt.
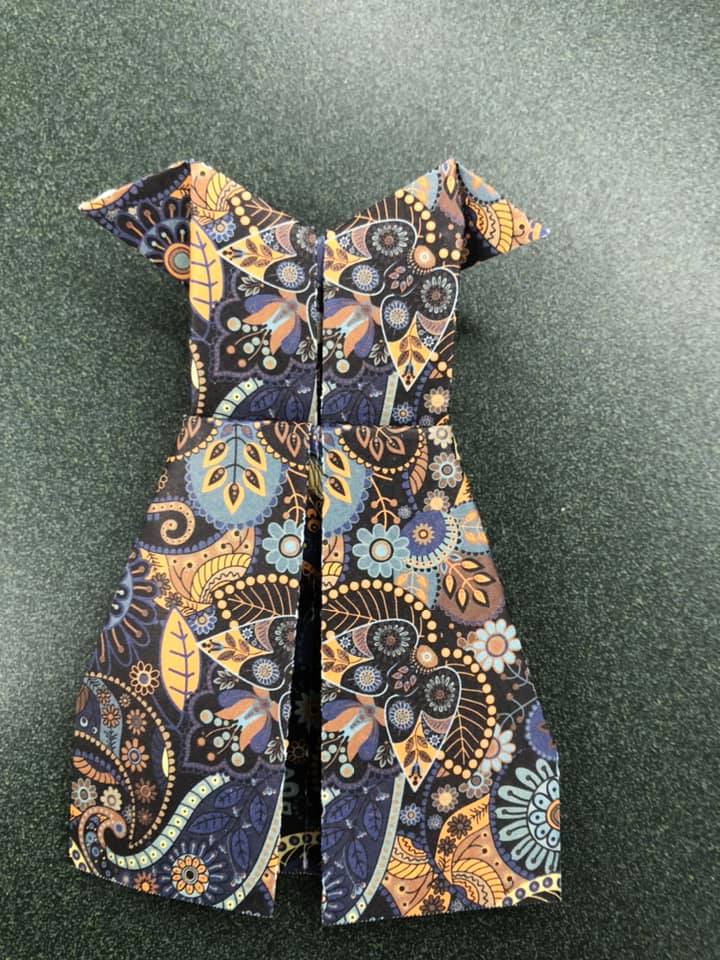
Turn work to the pretty side and fold the 2 top points directly to each side, making cap sleeves. Ta da! You’re done!
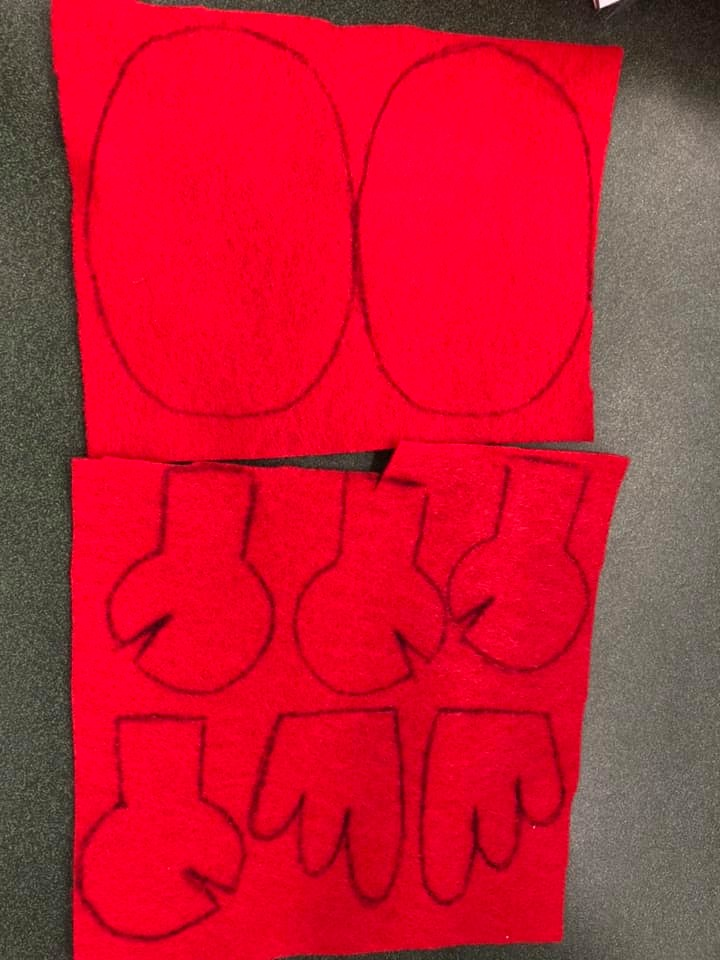
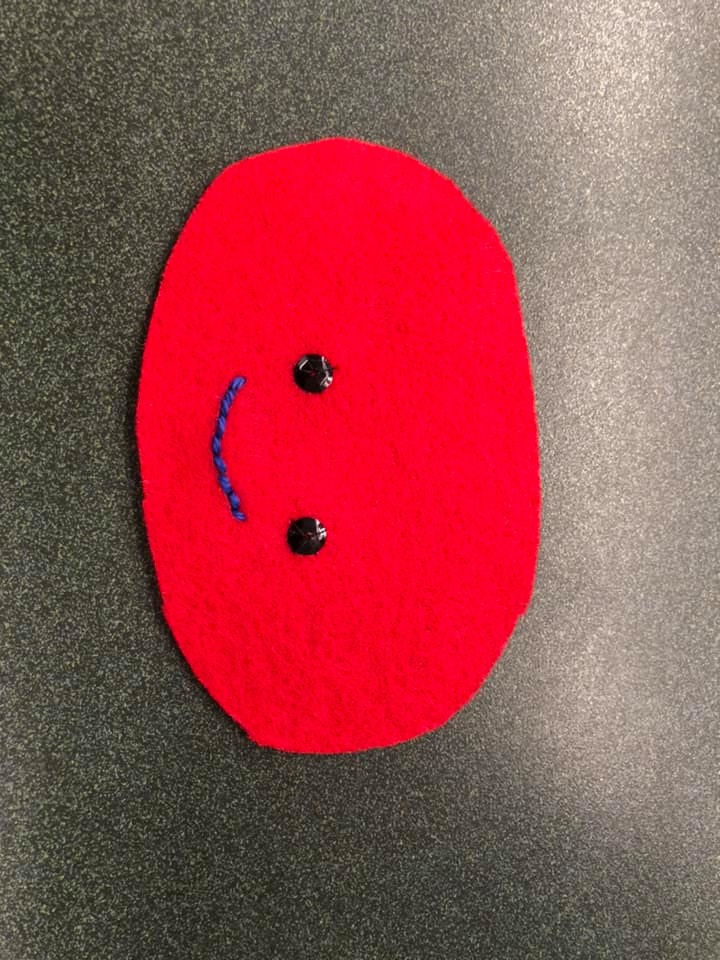
Cut out felt pieces, making sure to trim off any ink marks from tracing.
Use large needle to embroider smile onto face
Use small needle to stitch sequin eyes onto face
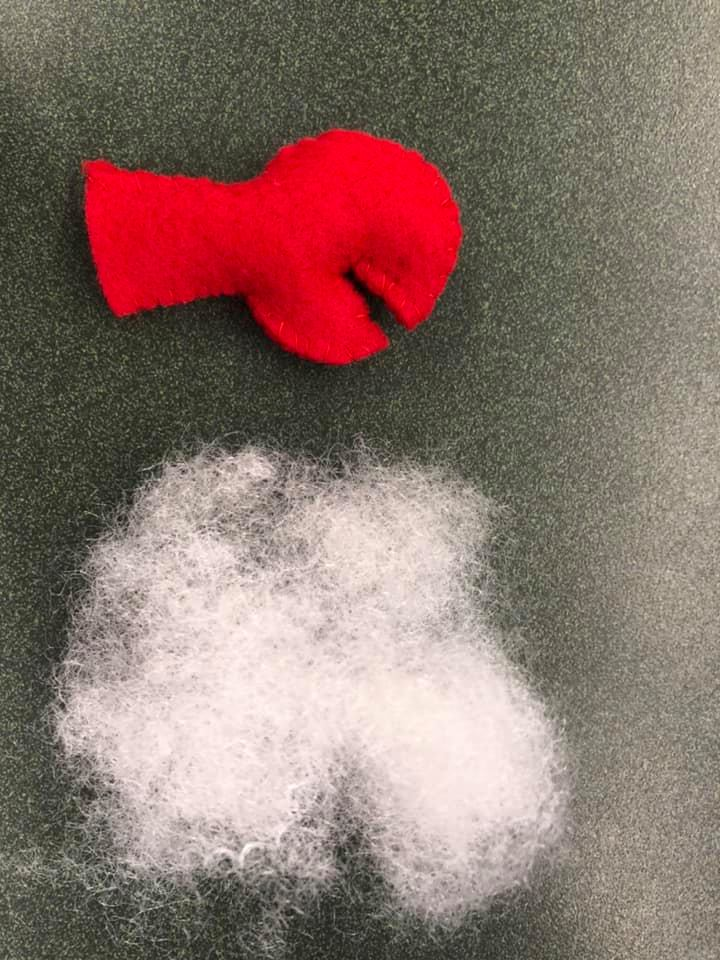
Stitch around claw, leaving bottom open. Insert fiberfill into claw (don’t give up, use a pencil or pen and keep poking it in there; it will resist at first but you will win this fight)
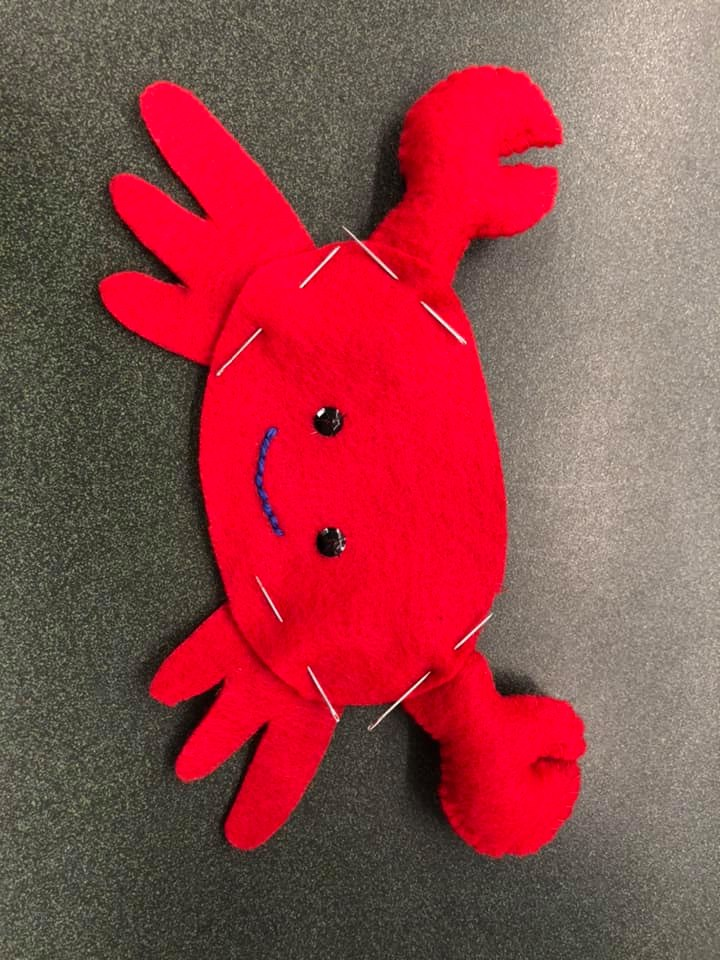
Using straight pins, pin the claws and legs into place. Sew around body of project, leaving an opening at the bottom. Stuff with fiberfill and sew closed entirely.
(project found in Mollie Makes magazine, issue #37 February 2014)
You will need: pen, scissors, sewing needle, black thread
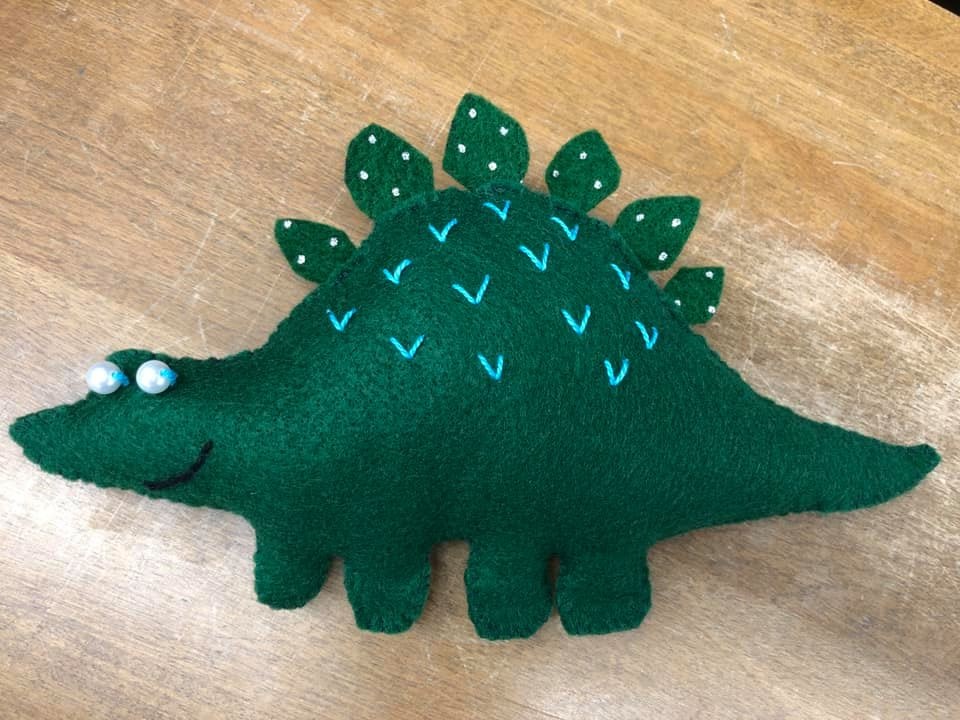
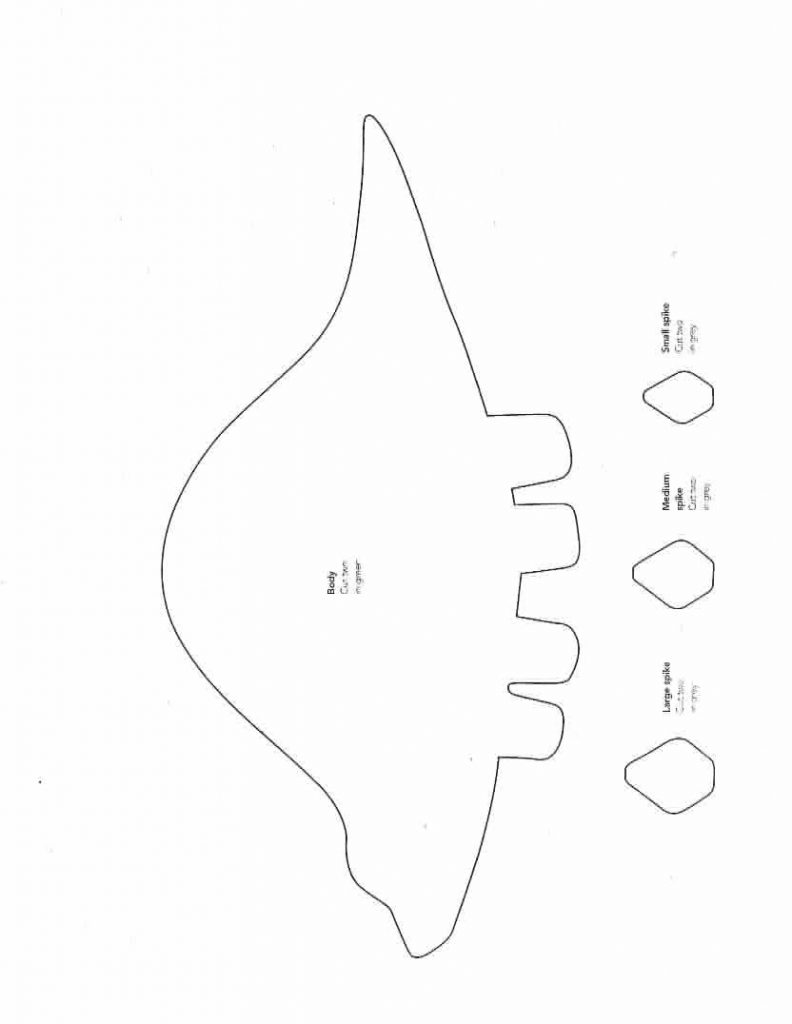
1) Using enclosed pattern, cut 2 body pieces in green felt. You will want to make sure you conserve your green felt – there is just enough to make the body if you plan ahead and economize.
2) Using enclosed pattern, cut 2 each of the spikes in light gray. (6 total spines)
You will decorate/stitch just one layer of green felt body:
3) Using your own needle plus pearl buttons and embroidery thread enclosed, stitch eyes in place.
4) Using color embroidery thread and needle, stitch “scales” onto the dinosaur’s side (random placement works fine).
5) Using black embroidery thread and needle, stitch smile in place.
6) Using black thread and needle, stitch spine pieces to your dinosaur’s back, spacing them as you like.
7) Using black thread and needle, stitch back to front of dinosaur, stuffing it with fiberfill when you are approximately ¾ complete.
8) Finish stitching the back of dinosaur to the front.
This easy White Bean Soup is loaded with fresh veggies and will keep you cozy all winter. It’s freezer friendly too, so don’t forget to freeze some for later!
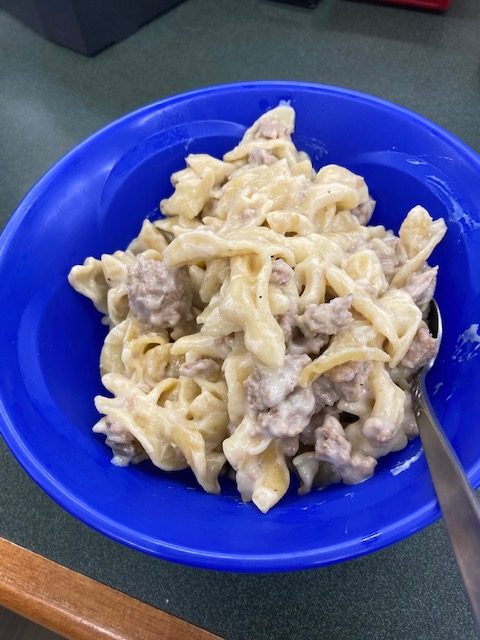
We found this on pinterest and thought it might be good enough to eat. Here goes!
yield: 4 SERVINGS
prep time: 15 MINUTES
cook time: 15 MINUTES
total time: 30 MINUTES
INGREDIENTS
1 lb. ground beef
1/2 onion, chopped
2 cloves garlic, minced
Salt & Pepper to taste
1 tablespoon flour
1 – 10.5 oz. can cream of mushroom soup
1 teaspoon Worcestershire sauce
3 cups low sodium beef broth
3 cups egg noodles, uncooked
1 cup sour cream
DIRECTIONS
1.Spray Instant Pot with nonstick cooking spray.
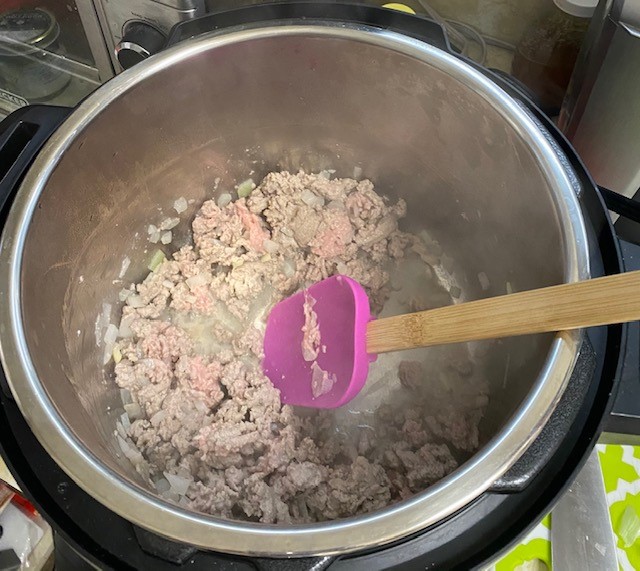
2.Brown meat, onion, and garlic using the SAUTE function on the Instant Pot. Season with salt & pepper. We were living on the edge and used ground turkey. Spectacular!
3.Add in flour and stir well.
4.Stir in cream of mushroom soup, beef broth, and Worcestershire sauce.
5.Add uncooked noodles and stir.
6.Place lid on Instant Pot and set to 8 minutes on HIGH pressure.
7.Once finished, turn the valve from sealing to venting to Quick Release the pressure.
8.Remove lid and stir in sour cream before serving.
2 tablespoons chopped fresh dill (Dried Dill works well also)
Zest and juice of 1 lemon
Kosher salt and freshly ground black pepper
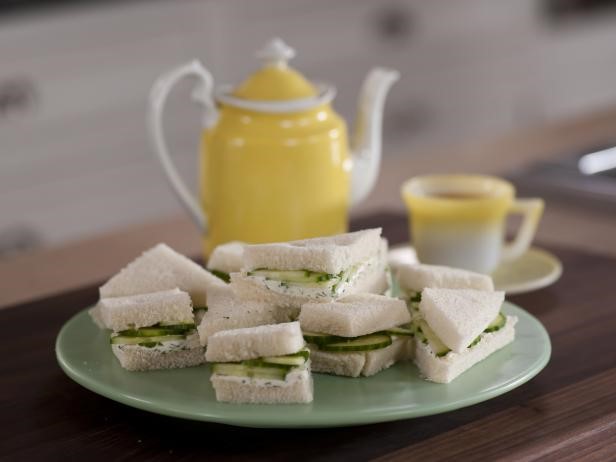
6 slices good-quality white bread*
1/3 large English seedless cucumber (about 4 inches), thinly sliced
Iced Tea or Hot Tea in a pretty cup.
Directions:
In a small bowl, combine the cream cheese, fresh dill, lemon zest, and lemon juice. Season the mixture with salt and pepper.
If using a full loaf, freeze and take out just before assembling. Cutting the crust off while frozen, makes a nice clean cut with very fresh soft bread.
Assemble the sandwiches while partially frozen, lay the slices of bread on your work service and distribute the cream cheese evenly among each slice, spreading into a thin layer. Arrange the cucumber slices in rows over 3 slices of the bread and cream cheese mix. Top with the remaining bread, and cut into quarters so there are 4 pieces from each sandwich, cover with plastic wrap and place in refrigerator to finish thawing. When table is all set with napkins and pretty little plates and tea, take sandwiches out and set on the table with some home-made flowers from paper, or little clippings from the yard.
This will help the sandwiches stay fresh and delicious. Enjoy a special tea with Mom or Grandma or that special person in your life who makes every day important. Happy Mother’s Day!
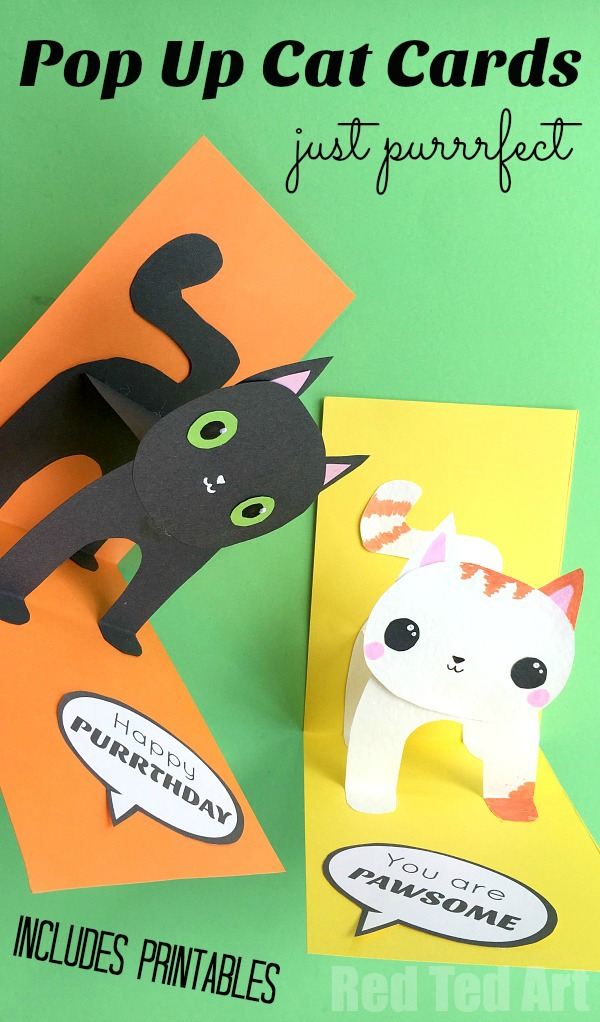
Begin by cutting your cardstock length ways in half and fold. (If you are using a library Take-and-Make, this step will already be done for you)
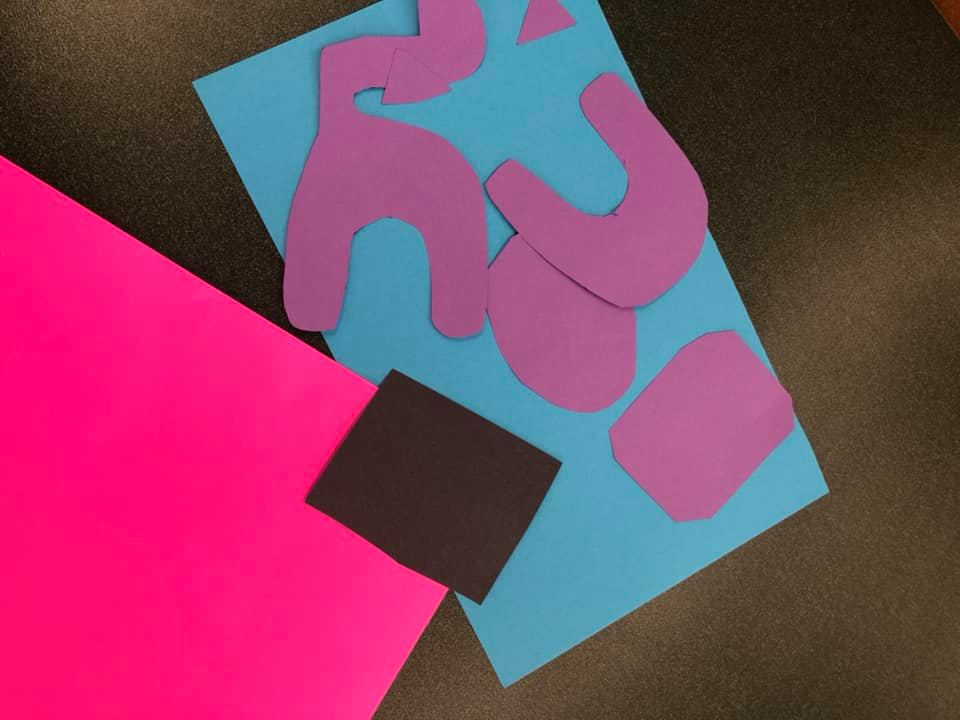
Next cut out your free printable – you need a head, a back body with tail, a front body, middle bit and separate ears. Print out on colored paper, or cut pattern out on white paper and trace out on colored paper. (If you are using a library Take-and-Make, this pre-printed page should be in your packet.)
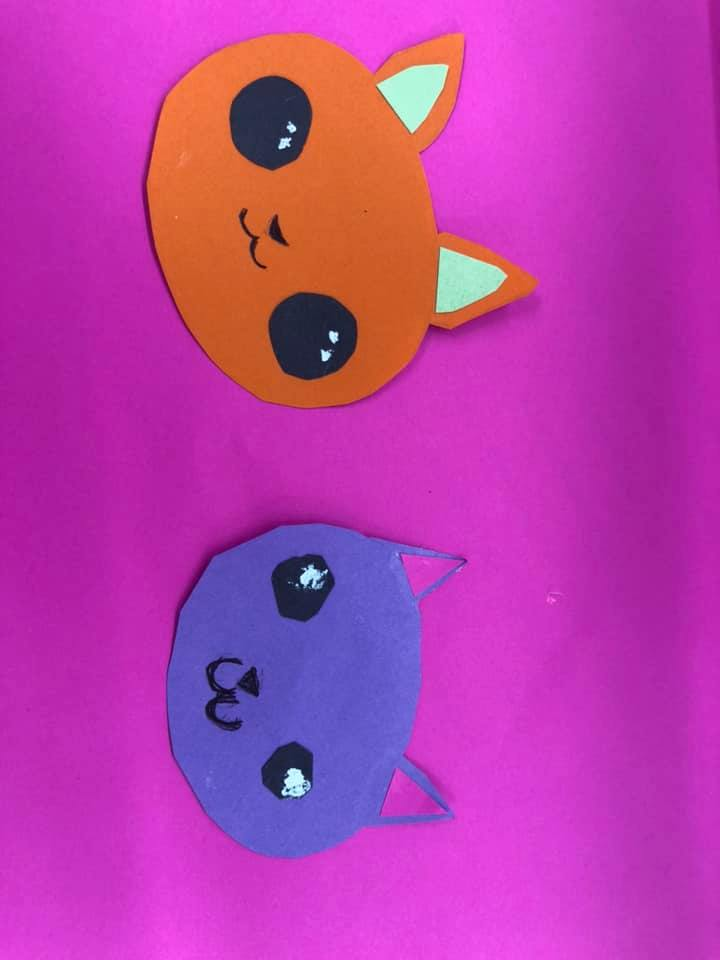
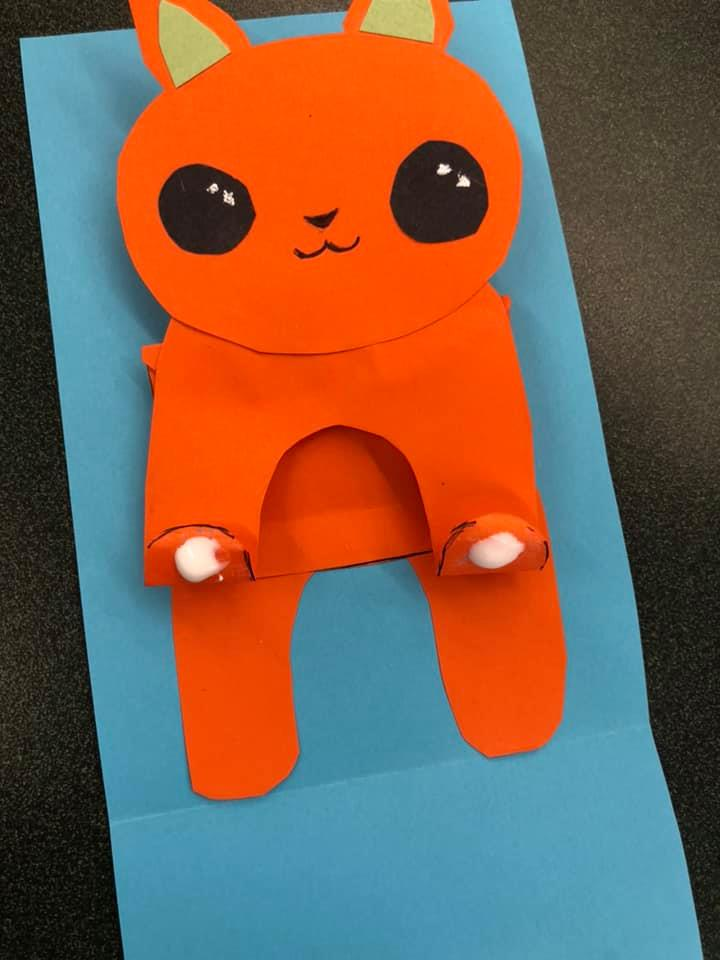
3. Draw the mouth/nose on the face using pen or marker and glue the eyes onto the face. We cut and glued inner ear pieces using a different color and then glued the ears to the backside of the face. Add the white dots to the eyes using white out or a silver marker and allow to dry completely.
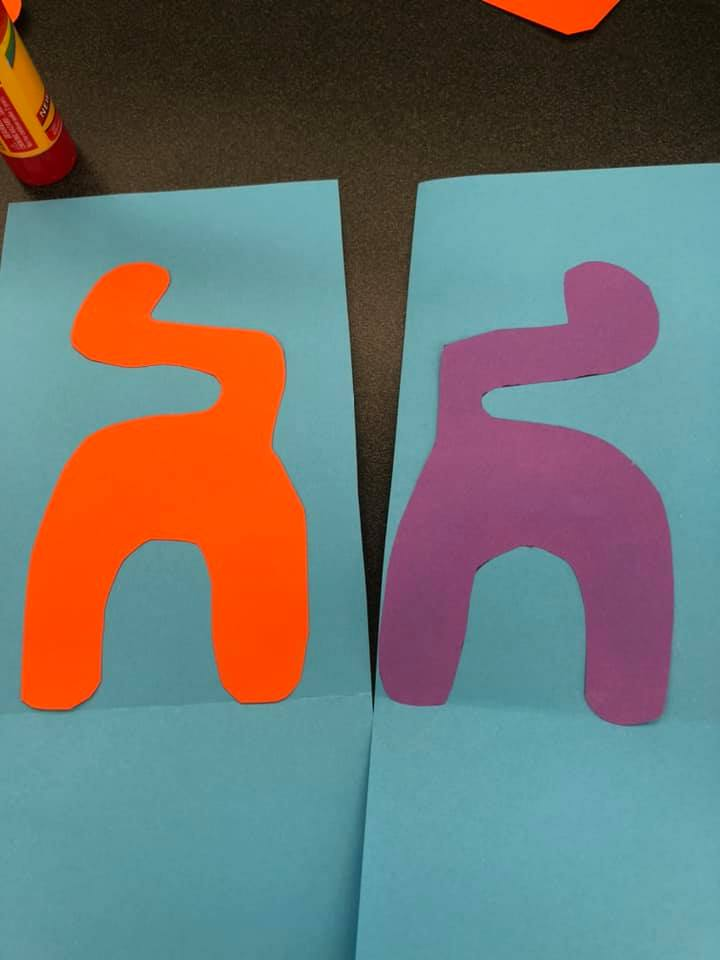
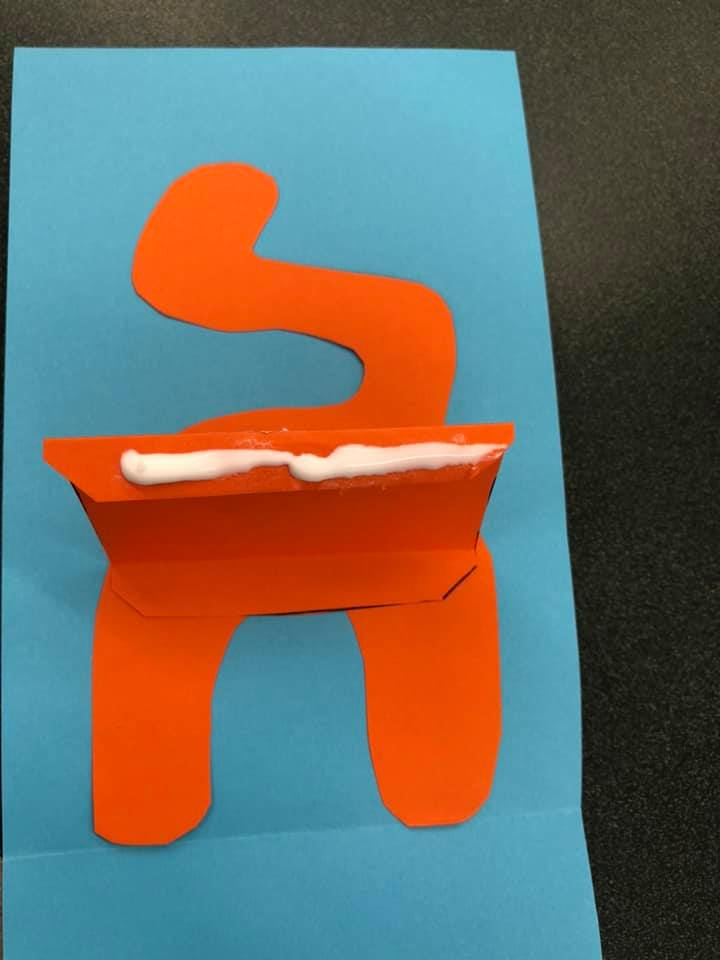
4. Glue the back legs/tail piece on at fold. Really, we should have folded the feet just a tiny bit and glued the tips of the toes below the fold, but this pattern is pretty forgiving, so it worked fine.
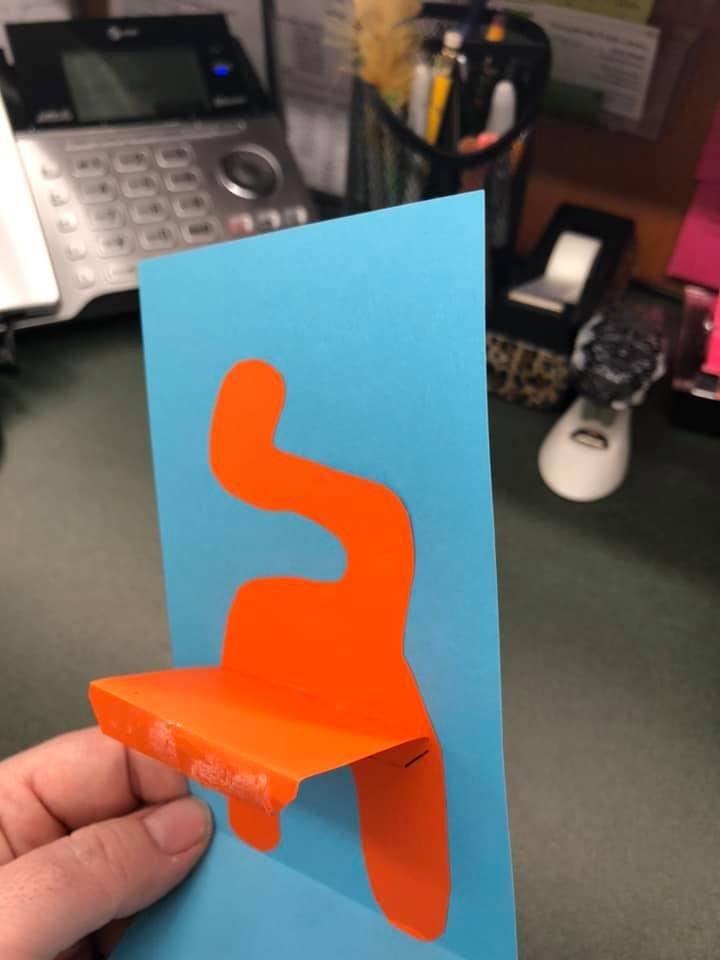
5. Next, fold 2 flaps on the rectangular piece so that it looks almost like a box lid. Glue one of those flaps to the back legs as pictured above.
6. Add a line of glue to the facing flap and glue the cat’s front legs. Glue the cat face onto the front legs.
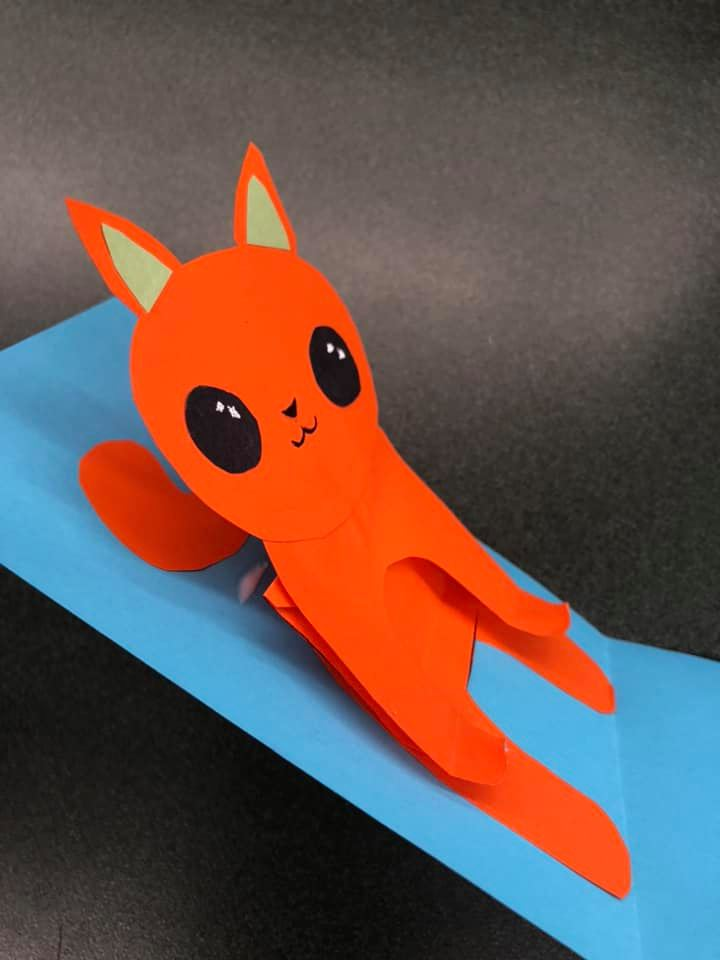
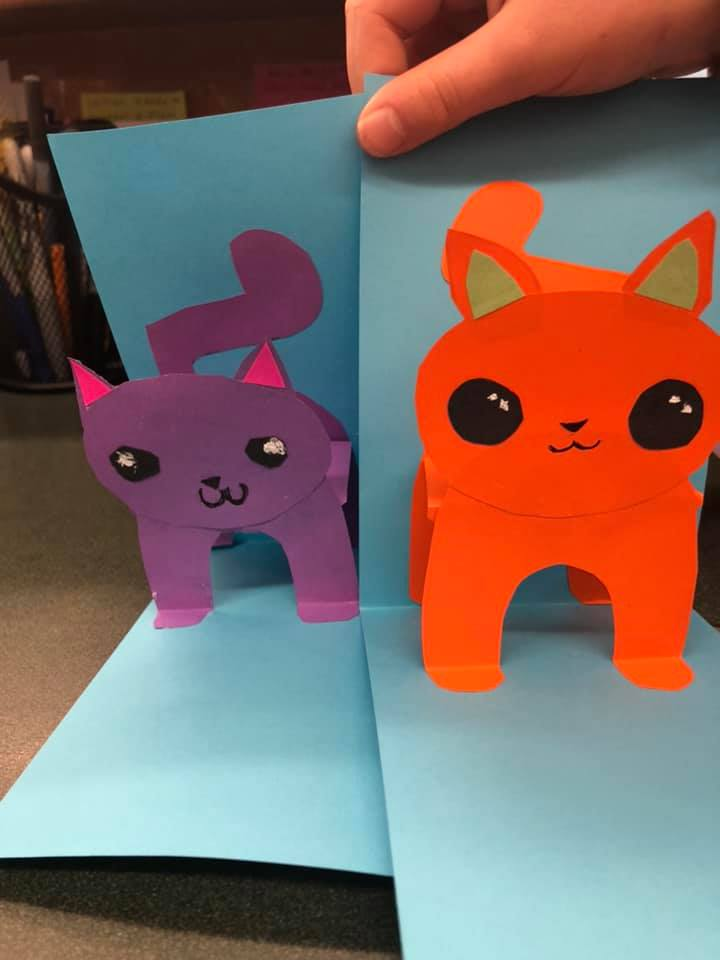
7. Fold the paws up just a little bit, evenly on both paws and dot with glue. Carefully, keeping the cat flat, fold the blue cardstock up and over the cat, adhering the front paws to the blue cardstock. This will allow the cat to fold flat AND to open up in 3-D.
Yarn: size 4 (medium or worsted weight yarn, minimum of 2 colors. Make note of colors you are using. ex: color A=gray, color B=white, color C=lavender)
Bag is worked in stockinette stitch (knit all stitches on right side~odd rows, purl all stitches on wrong side~even rows).
When working rows with 2 colors, carry colors loosely across wrong side of work.
With yarn color A, cast on 49 stitches (NOT 109 stitches like the downloaded pattern may read)
Row 1: K color A to end
Row 2: [P3 color A, P3 color B] to last stitch, P1 color A
Row 3: K1 color A, [K1 color B, K1 color A, K2 color B, K2 color A]
Row 4: P1 color A, [P3 color B, P3 color A]
Row 5: K color B to end
Row 6: P color B to end
Row 7: K color B to end
Row 8: P1 color C, [P3 color B, P3 color C]
Row 9: K1 color C, [K1 color B, K1 color C, K2 color B, K2 color C]
Row 10: P3 color C, P3 color B to last stitch, P1 color C
Row 11: K color C to end
Row 12: P color C to end
Row 13: K color C to end
Row 14: [P3 color C, P3 color D] to last stitch, P1 color C
Row 15: K1 color C, [K1 color D, K1 color C, K2 color D, K2 color C]
Row 16: P1 color C, [P3 color D, P3 color C]
Row 17: K color D to end
Row 18: P color D to end
Row 19: K color D to end
Row 20: P1 color E, [P3 color D, P3 color E]
Row 21: K1 color E, [K1 color D, K1 color E, K2 color D, K2 color E]
Row 22: P3 color E, P3 color D to last stitch, P1 color E
Row 23: K color E to end
Row 24: P color E to end
Row 25: K color E to end
Row 26: [P3 color E, P3 color F] to last stitch, P1 color E
Row 27: K1 color E, [K1 color F, K1 color E, K2 color F, K2 color E]
Row 28: P1 color E, [P3 color F, P3 color E]
Row 29: K color F to end
Row 30: P color F to end
Row 31: K color F to end
Row 32: P1 color A, [P3 color F, P3 color A]
Row 33: K1 color A, [K1 color F, K1 color A, K2 color F, K2 color A]
Row 34: P3 color A, P3 color F to last stitch, P1 color A
Row 35: K color A to end
Row 36: P color A to end
After completing 36 rows, repeat this pattern once more and then repeat rows 1-24 after that. 96 rows total.
Bind off all stitches
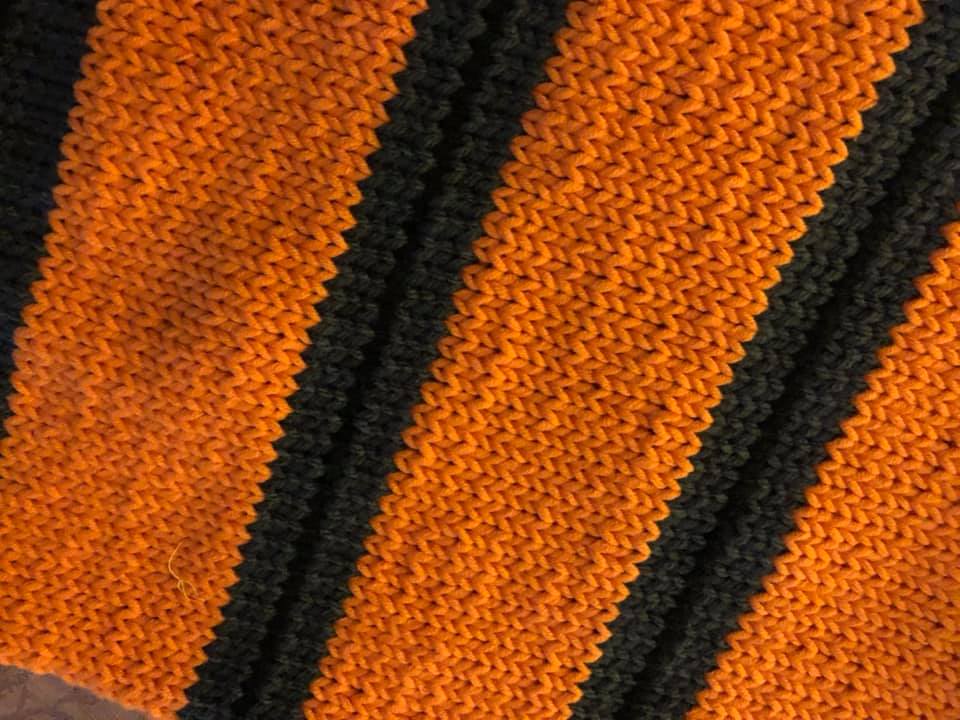
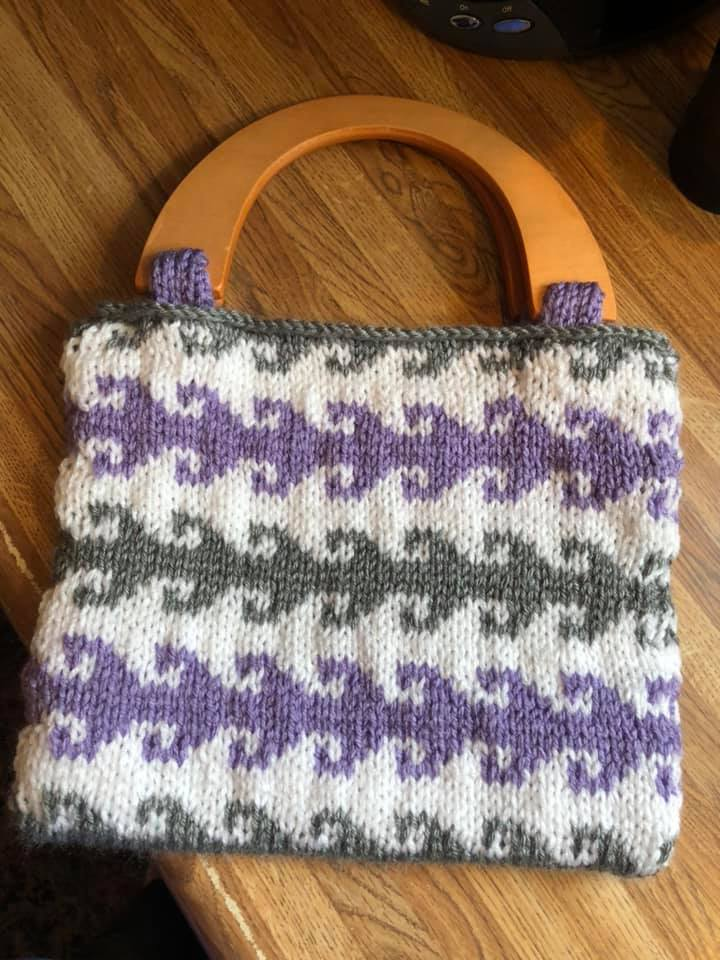
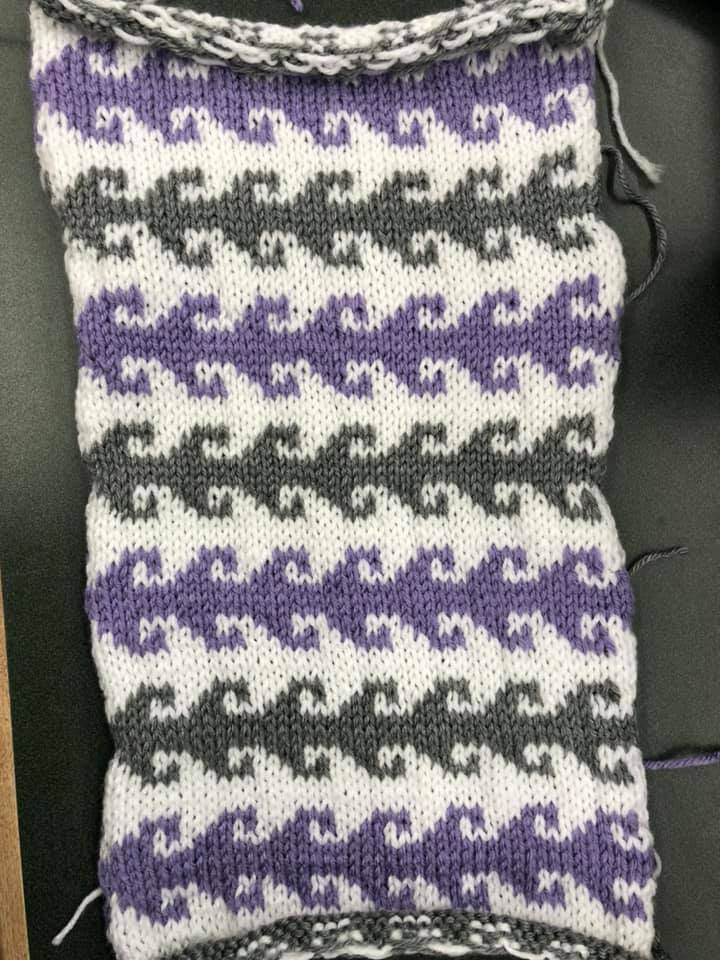
This is how mine turned out at this stage (front and back of project):
(Julie adds: Planning to sew a liner? I think I may just as well, since I don’t want the project to lose its shape with use. I will be storing real life clunky objects in this bag, like car keys.)
To make handle straps (make 4, NOT 2 like the pattern reads)
With color yarn of your choice, cast on 7 sts
Row 1 (right side): Slip 1 knitwise, knit across
Row 2 (wrong side): Slip 1 purlwise, purl across
Repeat rows 1-2 until piece measures 4 ½ inches.
Bind off, leaving a long end for sewing.
Finishing:
Thread yarn needle with long length of yarn. Fold bag in half with right sides together. Match seams and rows. Sew seam.
This is the liner I made:
With bag flat on a hard surface, measure for Handle Strap placement. Thread needle using the long tail left on each strap. With wrong side of Handle Strap and wrong side of bag both facing you, sew each Handle Strap to Row 2 of bag. Thread strap through wooden handle, fold Handle Strap, with wrong sides together and matching cast-on edge with bind-off edge, sew securely. Repeat for opposite side of bag.
Place liner inside bag and whip stitch around top of bag, tacking liner to knit bag.